Rick Hurst Web Developer in Bristol, UK

Menu

Category: campervan

Down the Rabbit Hole of #vanlife on social media

When I started this blog (as “Rick on the Road”) in 2010, Instagram was yet to be launched, and it was another two years before Foster Huntington popularised the #vanlife hashtag on instagram. There were plenty of campervan-related videos on YouTube, but relatively few dedicated channels – at least compared to the massive amount that exist today. The first channels I remember watching were Chad DeRosa’s “Living The Van Life” and Where’s my office now (both US based) and Campervan Culture (UK based). Campervan Culture in particular raised the bar for the quality of video production as time went on, and was certainly the first time i’d seen drone footage in an “amateur” campervan video.

At time of writing there is a massive amount of choice of vanlife-related youtube channels, most of which have a parallel life in the form of an instagram account.

But what does “vanlife” actually mean?

This is a contentious issue, it seems. It’s a made-up word, with the word van and life joined together, and it seems to refer mainly to people who live in vans. I’ve seen comments on instagram and youtube where a full-time “vanlifer” will angrily claim the term for themselves, but with over 3.7 million instagram posts (at time of writing) using the tag, and i’d hazard a guess that only a tiny proportion of those pictures depict people living full-time in a van, so it’s a pretty generic term covering pretty much anything campervan-related whether it’s living in one, building one, or lying in the back of one looking at a sunrise while you pretend you haven’t just scrambled to set up the self-timer on your camera.

Is it possible to make a living making vanlife youtube videos?

It seems some people are, but they’ve had to work at it – regular videos with decent content, subscribers built up over a period of years, well designed thumbnails to draw people in (sometimes, dare I say, using clickbait tactics!). I was curious to know how much income some of these channels might generate, purely on youtube ad revenue – socialblade is a really useful site, if you want to get an idea. In short, even the most popular channels I watch aren’t making that much – a living possibly, but only if you have no rent/mortgage to pay because you live in a van! Having said that – youtube ad revenue is only part of the story, with sponsorships/ ad placement/ merchandise sales etc. also being a source of revenue. There’s also Patreon which is a sponsorship platform that some of the channels use for subscription-only content.

Vanlife community

While we were planning and saving up for our current van, I started regularly watching van-related youtube channels and it became like reality TV for me. Most of the vans in the videos have their instagram names displayed so potential followers (instagram) or subscribers (youtube) can easily find them online if you spot them in the real world.

Here are some of the channels i’ve been watching recently. I’ve realised these are all UK-based channels – this wasn’t intentional but i’ve found the content to be more relevant to me than most of the US-based ones i’ve watched (plenty of good ones, maybe i’ll do another post on those), so i’ve just gravitated towards these channels.

Indie Projects

This is probably the most popular uk-based vanlife channel – i’ve been following Theo and Bee on instagram before they even came up with the indie projects name. Their videos are a mixture of their own van adventures, initially in a VW T4, van tours of other people’s vans, their new van self-build sprinter van and their plans for a homestead in Portugal.

Youtube Channel

Instagram

Website

Beyond the van

Rich from beyond the van popped up in a couple of Indie Projects videos and I started watching his various van conversion and European trip videos. The van conversions range from a Renault Kangoo up to an LDV Luton van. Loads of practical content to be found on the channel.

Youtube Channel

Instagram

Website

From Rust to Roadtrip

A really good travel series from Lucy and Ben, a couple travelling Europe in their self-converted LDV Convoy. Nicely filmed and narrated, plenty of travel inspiration to be found in these videos, even with the frequent breakdowns!

Youtube Channel

Instagram

Website

Houseless not homeless

Martin has some funny content, I started watching this channel when he rapidly kitted out an old BMW estate to go travelling in when his van was off the road – if you’re on a budget and want ideas and a laugh, this is the channel to watch!

Youtube Channel

Instagram

Website

Finding Freedom

Originally a couple travelling Europe in a transit van, currently about Possy building her own LDV convoy camper on a budget – regular crossovers with Beyond the Van – the live streams are fun.

Youtube Channel

Instagram

A Bus and Beyond

All the channels mentioned so far cover self-build vans and vanlife on a budget – Shaun and Lizzy cover the other end of the vanlife spectrum reviewing new stuff that costs almost as much as a house, and staying on actual campsites. Very watchable, and it’s interesting to see what’s on offer to buy off the shelf if budget wasn’t an issue.

Youtube Channel 

Instagram

Website

Vanlife.tv

Lots of practical content on this channel – originally based around a VW T4 similar to ours, now building out a Vauxhall Movano.

Youtube Channel

Instagram

Website

Project Amber

“When life gives you lemons, piss off somewhere and be a hippy”. Wise words. Very entertaining channel following this guys European adventures in a converted ambulance.

Youtube Channel

Instagram

Sarah and the Bear

A relatively new channel, these two are very chilled travelling the country and national trust properties in their white VW T25 (makes me very nostalgic for Rocky, our previous van!).

Youtube channel

Instagram

Northern Explorers

I found this channel when I was looking for information on the retro-looking Barefoot Caravan. Then in a massive coincidence a few days later I bumped into them with their Barefoot at a campsite, and got a real-life tour, it was like stepping through the screen!

YouTube channel

Never read the comments on YouTube!

Youtube seems to attract the best and the worst when it comes to comments – I think the majority of the comments on these channels are positive, but there’s a lot of idiots commenting too – best avoided if you don’t want to come crashing straight back down to earth after a dose of vicarious vanlife!

Freerange Freelance on Social Media

No immediate plans for a Freerange Freelance youtube channel, though I wouldn’t rule it out entirely. But we are on instagram and twitter.

Do you have a vanlife channel/instagram channel that we should be following? Nudge us on instagram and let us know!


Fitting a swivel seat base to a vw t4

One of the first jobs on the list when we bought Hercules was a swivel base for the passenger seat. T4 vans come with either a double passenger seat, so you can fit three people up front (would be handy actually, as we only have four seat-belted seats), or a single passenger captain seat. Hercules came with the latter.

There are two main different types of seat swivel – a swivel plate, which fits between the seat and the standard seat base, and a swivel base, which replaces the standard seat base. After a bit of research I chose the latter, on the basis that this would leave the seat at the same height as it would be on the standard base, whereas a plate will usually raise it slightly. I actually used a swivel plate on Rocky, our last T25 camper.

I ordered one from SVB Accessories , on the basis that it was crash-tested and a good price. They also do a version with a built-in safe which I was tempted by, but i’m kind of reluctant to put a (visible) safe in the van, as to me it kind of advertises to a potential thief where you keep your valuables. Or maybe you could double-bluff and have a visible safe as a distraction, but keep your valuables somewhere else!

Having had much older vehicles, I wasn’t sure how long this job would take, but luckily it went entirely to plan. Firstly, I slid the seat all the way back, and undid the allen bolts which hold the seat rails to the base.

Then I slid the seat all the way forwards and undid the allen bolts at the rear of the rails.

Then you can remove the seat, with rails still attached.

Using a socket wrench, you then undo the four nuts on the bolts which attach the seat base to the cab floor.

Then you bolt the swivel seat base in, and attach the rails to it. The base came provided with bolts, but I used the original allen bolts (as they sit flush inside the rails) with the nuts from the provided bolts.

All in all probably 25 minutes, which is a miracle for me, as I have been known to make a 25 minute job last all weekend!

Introducing Freerange Freelance!

Those of you who have followed a link to campervanthings.com might be confused to see a different domain name and site title “Freerange Freelance”. Let me explain!

The first version of this blog was called “Rick on the Road”, which started as a travel blog years ago, when my wife and I started looking at the idea of spending the summer touring france, with our (then) young kid while I carried on working as a freelance web developer, attempting to keep an old plastic macbook with a two-hour max battery life charged from an inadequate portable solar panel, and attempting to keep in touch with clients and upload code over sketchy campsite wifi.

After that trip, the blog lost momentum until we bought a camper van and I enthusiastically relaunched it as “camper van things”, and wrote almost exclusively about camper van things.

It then lost momentum again, particularly after we sold the camper. This year having bought another van I thought I would give it a refresh and start writing again, and in doing so, I decided that the name of the blog didn’t really reflect what this blog is about.

So what is this blog about then?

I’ve worked (mostly) as a freelance web developer for over ten years now and the goal has always been flexible working. I’m lucky enough to have built a career that revolves around the internet and remote-working tools, and so most of the time I only need a charged laptop and a decent internet connection (wifi or 3G/4G)  to do my job. Moreover, I prefer flexible work hours, and not having to commute to an office “day job”. All of those aspirations can be difficult to achieve sometimes, which I will talk about on this blog.

But you’re still going on about camper vans?

Yep! As far as i’m concerned, a camper van makes the perfect mobile office, and is the best way to combine travel, adventure and freelance work. Plus I just love camper vans, so they will still feature prominently, particularly the one we own.

Freerange Freelance

Naming a blog is almost as difficult as naming a band. My wife is also freelance (TV/Video production/Copywriting) and we threw around a few ideas before coming up with this, then impulsively reserving the domain name and instagram handle. Twitter username character limit wasn’t long enough, so I left that one as @campervanthings for now. I think Freerange Freelance better covers the scope of this blog and any associated social media accounts.

Web development stuff

I’ll refrain from talking too much about web development on this blog, as I have another blog for that – if you’re interested in code, take a look at rickhurst.co.uk.

Using a cheap Quechua tarp fresh as a campervan awning

Using Quechua Tarp Fresh as campervan awning

We are using a Quechua tarp fresh as an awning/canopy. We already had the tarp, which we used for tent camping to provide some outdoor rain cover or shade. We bought a couple of spare poles to give us more height and options to set it up as standalone canopy.

Our T4 had an awning “C” rail fitted in the roof gutter, and a quick bit of research showed that you can attach a “kador” strip to these. I ordered a length of kador strip off ebay and wondered if I should sew it to the tarp, but in the end I decided to put some brass eyelets in the strip then attach to the awning using toggles and some elastic shock cord.

C channel in the roof gutter of a VW t4, fitted with kador strip

The advantage of this over sewing is that if we need to move the van, the toggles can be removed and the kador strip pulled out, without needing to unpeg the awning. Plus I can’t sew!

Awning attached to kador strip using toggles and eyelets

Our T4 is the short wheelbase version – the awning is slightly wider than the rail so I tie either end down across the windscreen and tailgate.

Awning attached to kador strip using toggles and eyelets

We have a van again!

New (To Us) VW T4 campervan

Far longer in the planning than i’d like, but we now have a campervan again! This one is a 2001 VW T4 2.5 tdi short wheelbase which is mostly converted to a camper already – rock n roll bed, side windows, sink with running tap, leisure battery, insulation etc.

We were considering getting a bare van and doing the conversion ourselves, but with the summer getting closer by the minute I thought i’d see what was around already ready to camp in and this one had just been advertised – we all decided it would be perfect.

So far we’ve added a cooker and table, the cooker is a Vango Combi IR Grill Cooker, which is now screwed to the worktop.

Vango combi IR Grill cooker in campervan

The table is DIY, and attaches to the side unit using a Reimo sliding table rail.

Making the table
Table attached via Reimo sliding table rail
Reimo sliding table rail

Future ambitions include a pop-top, swivel passenger seat (or both seats, but leisure battery would need to be moved), and to create, or buy, a full length side unit for extra storage.

The van came with a cab bunk, but our teenager is too tall for that now, so during an experimental overnight camping trip we worked out that they could actually sleep on a self-inflating mattress on the floor, mostly under the bed but with head and shoulders in the space at the foot of the bed. Not ideal, and they’ll more likely be in their own tent until we get the pop top, but it’s good to know we can all sleep in the van as it is if we need to e.g. at an Aire du camping or other stopover where a tent can’t be pitched.

Minimal campervan conversion – what actually constitutes a campervan?

Minimal campervan

A year on from saying goodbye to our last campervan, we are really missing vanlife, so making plans for the next one. Our last van came to us fully converted as a 4-berth camper with pop-top roof, cooker, fridge, rock and roll bed, table wardrobe, cupboards etc., but this time we are planning a full DIY conversion ourselves, on a more modern van.

Being the master of unfinished projects, I don’t want to spend months and months converting it before we get to use it, so the idea is a phased approach, starting from the bare minimum, then adding to it over time.

So what actually constitutes a campervan? It will be a van, a short wheelbase panel van of some kind – we need to be able to park it on our crowded streets and drive it as a family car. Obviously, we want to be able to camp in it – sleep, cook and have somewhere to sit comfortably inside.

In theory, all you need then is to use it like a “tin tent” – chuck some camping gear and airbeds in the back and you have a campervan, but the basic DVLA criteria to be able to officially reclassify a panel van as a motorhome in the UK include:-

  • A fixed bed
  • Cooker
  • Side Window
  • Fixed table
  • Sink and tap

My first campervan didn’t meet these criteria, it was a very minimal conversion – a fold-down single bed made from an ikea futon frame, a freestanding gas cooker from a caravan bungeed to the rear of the passenger seat, and some rugs and stuff. At a push you could sleep 3 people – one on the bed, one on the floor and one across the engine bay diagonally, but only one of these options was remotely comfortable. That van was more of a hippy ex-student road-trip bus, not a family campervan.

I’ve also read that some campsites and festivals won’t accept a van unless it appears to be a camper van – nominally for safety regulations, but probably also to stop people just turning up in hired vans or builder’s vans with an airbed in the back and binbags taped over the windows.

So there’s some “official” criteria we need to meet eventually, if we want to reclassify it as a motorhome but there are also some minumum requirements of our own, to enjoy it as a family campervan. We want to be able to sleep three people comfortably – two adults and a taller-by-the-day teenager. This will be the biggest challenge until such a time we fit a pop-top to gain an extra double bed. I have some ideas, which may or may-not work, but there’s always awnings/ pop-up tents if we can’t all sleep comfortably inside straight away.

We need to cook, so I plan to build a unit to house our existing camping gas cooker, to keep it secure and to be able to store the gas bottle securely underneath. We can survive without a sink initally – even with the sink and tap in our last camper, we tended to wash up on a table using a washing up bowl.

We also need to be able to sit comfortably inside – many of our UK trips have been rainy and cold, so whatever bed arrangement I build needs to be able to be reconfigured during the day to allow us to sit around in a mobile living-room.

I’ll certainly want a leisure battery to keep interior lights, music and phones/ laptops running away from electric hook-up for a weekend. I have a plan for that, which i’ll cover in another blog post.

Taking a break

Camper Van Things is taking a break for a while. It’s been fun, but Rocky has moved onto new adventures with a new owner, and therefore our current camper van adventure has come to an end. I’m not sure whether the content from this blog will be rolled back into my personal blog, or whether it will continue down the line if/when we get another van. So long for now!

You can take a man out of a camper van but…

Rocky T25/T3/Vanagon

It’s sad I know, but while visiting the warehouse where Rocky is laid up for a while, I got nostalgic for my second home, and spent a while sat inside, working on my laptop, listening to some music, and had some lunch!

I also removed the bike rack, bumpers, grilles etc. ready to attack the bodywork with an angle grinder (flap disc only – nothing too drastic!)

Microcampers, teardrop trailers and compact caravans.

2cv towing teardrop

Our VW camper is already pretty small, but will sleep four adults, and will fit in a regular parking space, but it is (for us) a second vehicle, and being a vintage vehicle, currently off the road again for some body work tidying and preventative maintenance. It therefore can be an expensive hobby, and we often discuss how we might be better off with something that could be used as a reliable family car and run-around as well as a campervan, or towed behind a small family car.

I recently went on a surf/skate trip down in Cornwall, and with Rocky off the road, found myself back in a tent. I think once you’ve experienced the relative comfort of living and sleeping in a campervan, a tent feels quite a step down! It didn’t help that I was in a tiny pop up tent, on a deflating airbed, trying to cook on a tiny picnic stove, which I struggled to keep upright.

Teardrop trailers and compact caravans such as the Eriba puck or slightly larger Pan Familia would be one solution – small and light enough to tow behind a small family car. The advantage of a caravan is that once pitched up, you can leave everything set-up and still have use of the tow car. Unfortunately, we live in a city, and have no off-street parking, so unless we paid for somewhere to store it, a trailer or caravan wouldn’t be ideal for us.

An estate car or small van is easily converted to a micro-camper with the addition of a mattress of some sort and window coverings for privacy, but a small car takes a bit more ingenuity.

After doing some research, I was amazed to see how common car-campers seem to be. Basically as long as at least one bed can be squeezed in some how, a can be used as a microcamper. If you google for “microcamper” or “car camper” on image search, you’d be surprised at the lengths people, worldwide, are going to to make their cars into DIY mini-campers.

Popular base vehicles for microcampers seem to be the Renault Kangoo and Citroen Berlingo – small, economical family cars, with an “estate” car rear end, making them like a small cargo van with the seats folded down. All manner of gadgets and conversions seem to be available, to cram in a double bed. Cooking activities usually take place to the rear of the vehicle, rather than inside – probably a sensible idea! These vehicles, or at least the van versions are the modern-day equivalent of the 2cv/ Dyane based vans – I actually wrote about an Acadiane microcamper (van version of the Citroen Dyane), a while back.

It’s not just DIY eccentrics building microcampers either – established motorhome converters are offering one and two-berth campers based on the Kangoo and Berlingo (at fairly hefty prices!). Even luxury brands such as BMW’s mini are getting in on the action, advertising the mini as a camper, using different set-ups such as a roof tent, a teardrop trailer and a single bed crammed into the interior of the clubman model.

We have a 1998 Vw “new” beetle, which we’ve done plenty of tent camping in, before we got our current camper. I started working out if there was any possible way of sleeping comfortably inside, without having to modify or remove the seating. Just for a single person, obviously – a surf-trip overnighter rather then a serious live-in vehcle. With the rear seats folded down, there isn’t enough room to stretch out, so I’ve set myself the challenge of coming up with a solution.

Anyone who has owned a new beetle will be aware how deep the dash is – space that can be taken advantage of, and also, despite being a small vehicle there is a surprising amount of headroom in the centre of the vehicle, due to the curved profile of the roof.

I recently spotted a “tent cot” on a campsite, and was also looking at a tiny hiking tent, both offering minimal headroom, just the basics in shelter from the elements – so I started studying the roof void of the beetle, and realised there could be a way to fit a full length bed in after all.

Watch this space!

Cool runnings – France 2014

T25 overheating

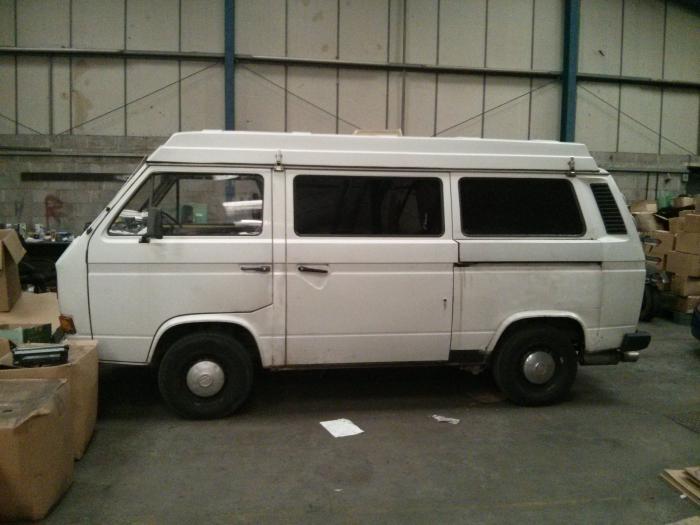
There’s a saying that people use after a successful trip in an old vehicle, something like: “I just did a 1000 mile trip and it didn’t miss a beat!”. At the end of July we did about 2000 miles round trip from Bristol down to southwest france and back and Rocky didn’t just miss a beat, but played the wrong song, pushed the drum kit off the stage and started to try to steal the guitars!

Before setting off to France with our new tdi engine conversion we covered 1500 miles in the UK without a hiccup, so I was confident that the engine was going to handle a similar distance on the continent. We decided to take the Plymouth – Roscoff ferry as we planned on travelling down the west side of france over a few days staying at Aires and municipal campsites to reach a family campsite in the Gers region.

On the approach to Plymouth, I noticed that the temperature gauge was a bit higher than usual, but it was a hot day, we were fully loaded and there were some steep hills. After the overnight ferry we headed off south, armed with the All the Aires in France book and a recommendation for a nice municipal site at Chatellerault. Once again, the temp gauge seemed to be a bit higher than usual (on test runs so far it had always sat mostly bang in the middle).

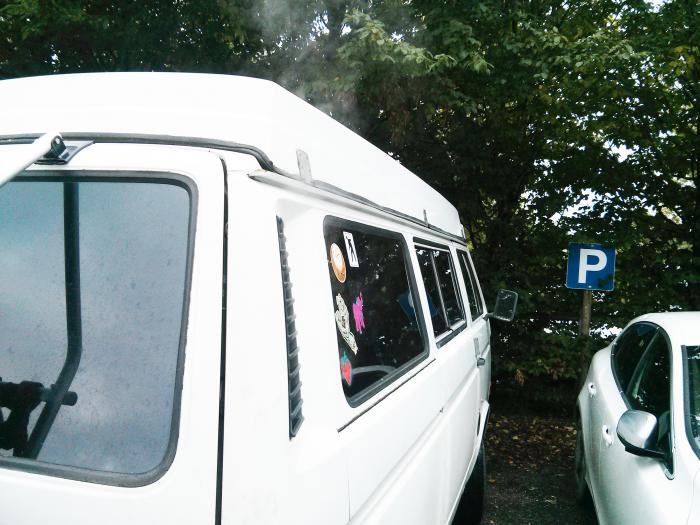
It was only when we came off the motorway and crawled through some roadworks near Cholet that things went seriously wrong. The temp gauge suddenly went to the top, the coolant light started flashing and we dived straight into a garden centre car park, switched off the engine and saw a plume of steam appear in the offside rear air vent.

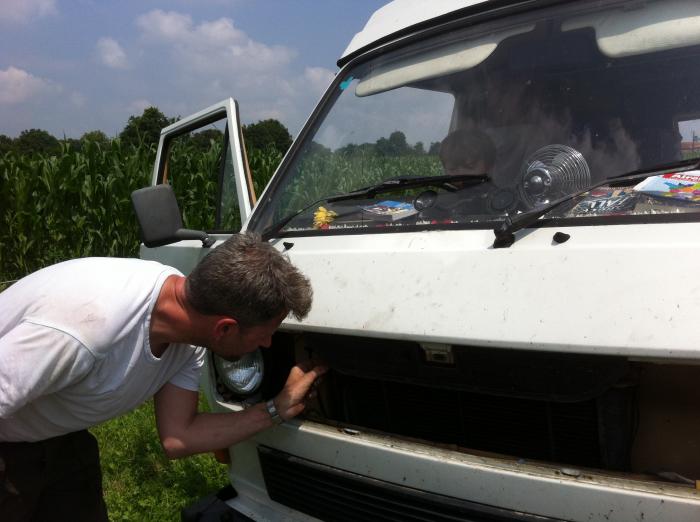
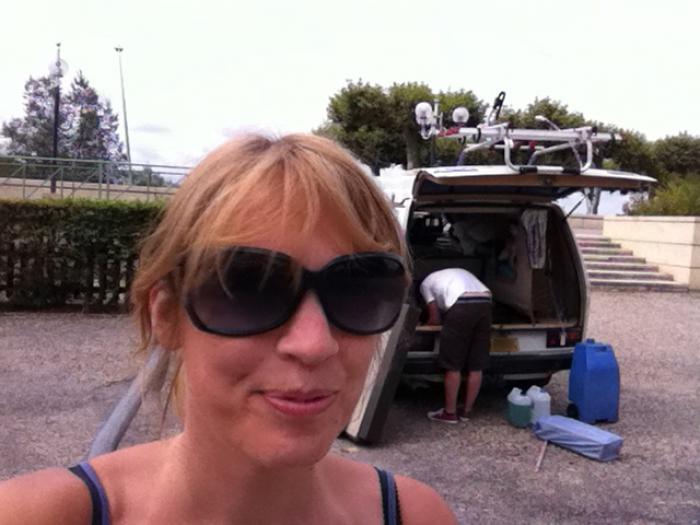
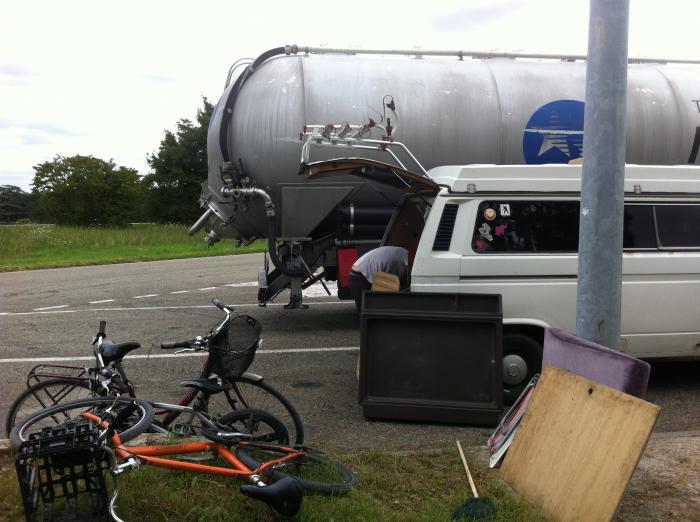
One of the annoying things about a T25 is that to get to the engine when the van is fully loaded you need to remove the bikes from the rear rack, then all the stuff packed in the rear section to get to the engine lid. This was the first of many times I had to do this..

After letting the engine cool down a bit, I started looking for problems – it was clear that the coolant had vented off through the expansion tank pressure cap (the expansion tank is the one inside the engine bay – my tdi conversion doesn’t have the second top up tank behind the number plate). I couldn’t see any other leaks, so topped up the coolant and thought it would be a good idea to bleed the system. To do this you need to start the engine – but the starter motor was dead – nothing at all.

We had European breakdown cover, but I was determined only to use it as a last resort, as I know from experience that the first thing they are likely to do is tow your camper to a garage, where you won’t hear anything for days, leaving you homeless.

So I tried all the usual things – jump start from the leisure battery (ours is suitable for starting engines), running a live feed straight to the trigger wire on the solenoid (as taught to me by an AA man in Norfolk on our first road trip in Rocky). Nothing got any response, and the only thing I didn’t try at that point was the “screwdriver across the starter terminals” technique – I was a bit nervous about doing so, until I had consulted the forums to get a consensus whether that was a good idea.

As the engine was cool now, we managed to bump start Rocky, with my wife at the wheel and myself and our 10-year old son pushing. I can confirm that a fully loaded T25 is a very heavy bus – if we weren’t on a slight slope I don’t think we would have managed it!

The temperature seemed stable so we decided to make some progress, and started picking out nearby “Aires de camping car” from the book. Just to clarify here – Aires de camping car are entirely different to the motorway aires – they are allocated spaces in towns and cities where motorhomes can overnight for a small charge, and luckily there are thousands of them across France.

We started overheating again on the slower roads, so stopped at a supermarket in Mauléon – parked on a slope, and I bought some more coolant and topped up again. Once again we had to bump start the van, but this time rather than heading straight off, I ran through the bleed procedure in case we had any airlocks in the system.

camping a Le Moulin de Chaligny near St. Amand sur Sevre

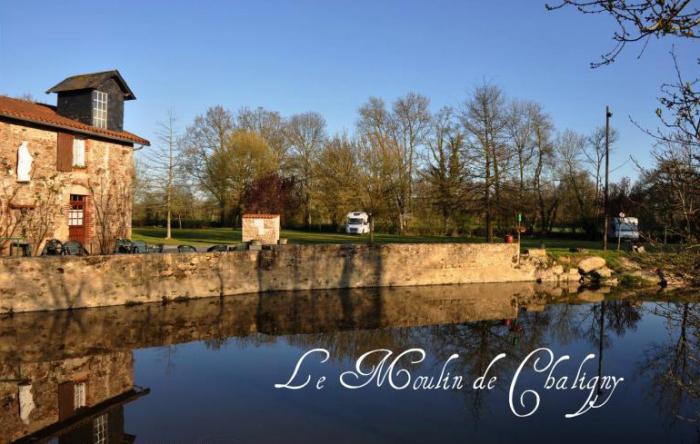
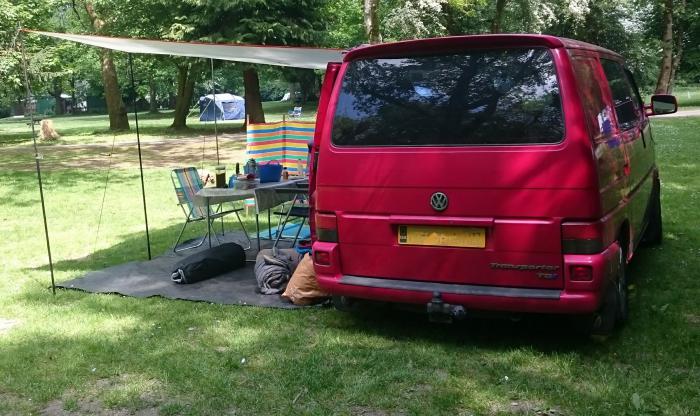
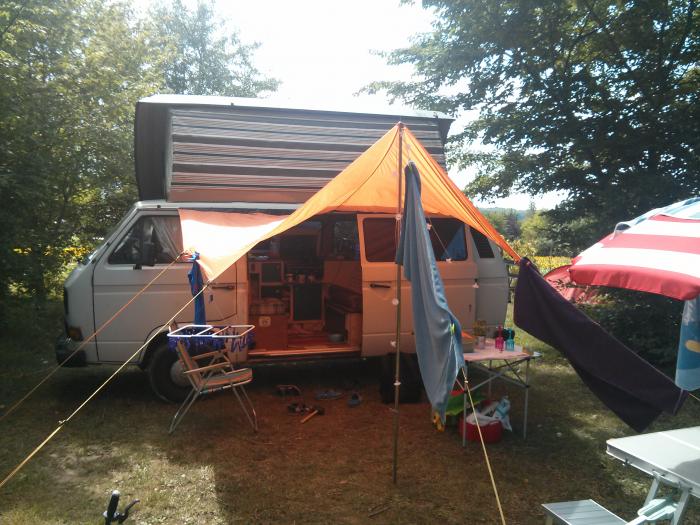
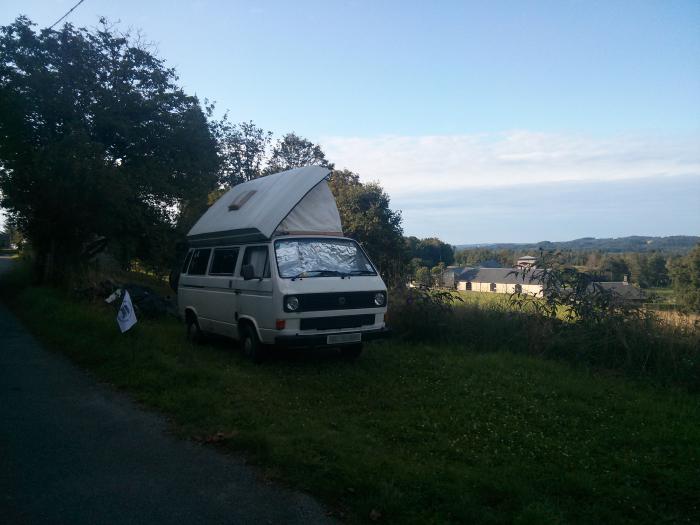
We headed for an Aire listed in the book, camping a Le Moulin de Chaligny near St. Amand sur Sevre, which turned out to be a really nice private campsite in the grounds of a bar/restaurant. Arriving in a cloud of steam, I picked a spot and parked up before enquiring if there was space, as I knew we weren’t going anywhere for a while! I would highly recommend it if you are passing by.

Luckily, the next morning the van started straight up, and has continued to do so every time since. My best theory is that the battery earth connection was bad and that the liberal soaking the battery and straps got during the first overheating episode was the cause?

Bleeding a T25 radiator

We spent the next couple of days at that Aire, with me mostly working on the van. – after consulting the forums and using the “phone a friend” option, I removed the thermostat (to allow coolant to always flow to the radiator), and extensively bled the system.
A few test runs showed that although the problem wasn’t fixed, the van behaved OK at higher revs. We filled up the diesel tank (I had a new tank fitted by Jeff’s VW shack before the trip as the old one would leak if you filled it to the top – although he problem was just a breather, the old tank was very corroded so a new tank was fitted). Once on the motorway the temp stayed stable, so we ploughed on down to the campsite we had booked at La Romieu in the Gers region. Once off the motorway the temp started to rise again, so we pulled over and let it cool down, and topped up and re-bled the system – frustratingly only a few miles from our destination.

Pitched up at camp de florence

Safely pitched up on the campsite at La Romieu, the holiday continued, but short trips showed that the overheating issue hadn’t gone away. With the help of a French friend we tried to find a garage to take a look at it, but it seemed that every garage in the surrounding area was either closed or understaffed due to August holidays. We set up our tents (we bought enough camping gear with us this year, after our breakdown experience last year) and dropped Rocky off at the only open garage we could find. The next morning they phoned and said they didn’t understand old vw vans and could we please come and take it away (no charge)…

I was fairly sure at this point that the cause of the overheating was a faulty water pump. I’ll save you the suspense, and tell you that it definitely was. I didn’t have the tools with me to change a water pump, and having not changed one before, I was nervous of digging the hole deeper – taking a running but ill-behaving van and changing it to a non-running one with bits of engine missing. In retrospect, at that point I should have gone ahead and ordered one anyway, to be delivered to the campsite. In further retrospect, in preparation for the trip, the water pump should have been inspected and tested (I presumed I had a new one in there at the time of the engine swap, but there you go..).

I also connected a “chicken switch” to the radiator fan, so the fan could be switched on manually – I actually used one of my redundant mystery dashboard switches – on closer inspection I found some old wiring leading from near this switch down to the thermoswitch on the radiator, so i’m fairly sure this was the one-time purpose of the switch anyway!

Sunflower field at camp de florence

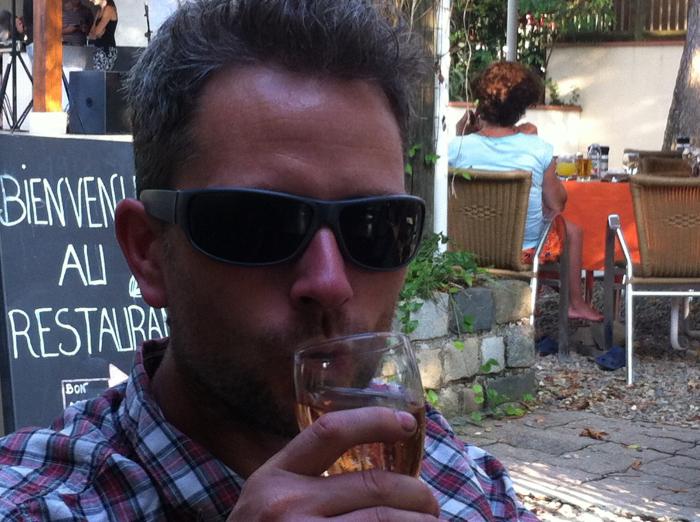
I’m missing out the good bits of the holiday here – campsite was great and the area was beautiful, it was very social, hung out with old friends and made some new friends, having a temperamental van that we didn’t want to take far from the campsite forced us to stop rushing around and enjoy the company, pool, ice creams, cheap rose wine, games and conversation (mostly about the van on my part, I have to admit).

Bar camp de florence

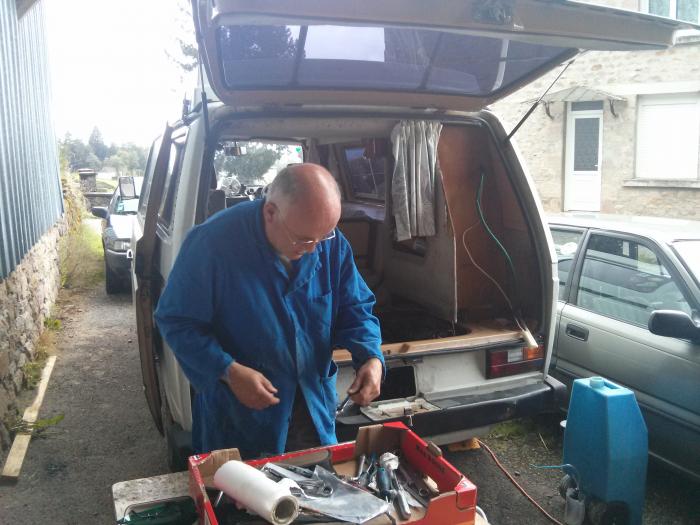
So at this point, the dilemma over the engine remained – call in the breakdown cover (i’m fairly sure they would just tow the van to the garage we had already tried) or struggle on. I then contacted the legendary John (aka “Sarran1955” -see his youtube channel here), as I knew he was only a few hours away in the Correze region, and had heard good things about him in the club 80-90 forum. It was arranged that we could visit him (if we could get there), camp on his land and he could help us out with tools and expertise.

Breakdown in Agen

The trip to Sarran didn’t start well, as we were approaching the town of Agen, the van started to struggle on hills and the turbo whistle had become very loud – we pulled over, offloaded the bikes and unpacked the back for the umpteenth time, to discover one of the silicone hoses for the intercooler had popped off. As the engine was hot and the pipe slippery from oil residue it took a while to reattach. About a mile down the road, as we accelerated onto the motorway, the same thing happened again, luckily as we passed a convenient Aire. Second time around I did a better job of re-attaching it and did a few hard acceleration test runs around the Aire (to the disapproval of several picnicking families).

Once on the motorway the intercooler hose stayed on this time and the van stayed at a stable temperature, but would rise quickly once on slower moving roads. We managed to reach the town of Sarran without any further breakdowns and met up with John at the Musée du président Jacques Chirac in Sarran. We were soon pitched up in a spot that will be familiar to several club 80-90 members, overlooking the surrounding landscape.

Pitched up in Sarran

I’ve already spoiled the story and told you that the overheating was caused by a failed water pump, but at this point we weren’t sure of this, so spent a few days investigating some other possible causes – we bled and re-bled the system, checked that water was flowing around the system, checked that there weren’t any leaks allowing air to get in. The confusion was caused by the intermittent nature of the water pump failure, so several times we came to the (wrong) conclusion that the water pump must be ok – it turned freely and we could observe water circulating in the expansion tank (most of the time). At one point we though it was solved and even did some fun hill climbs following John in his air-cooled T25 up to Puy de Sarran, the highest point in the area, without overheating, only to overheat on a leisurely drive a few hours later. In the end we decided that the water pump should be replaced anyway, even if just to rule it out as the cause.

John in Sarran

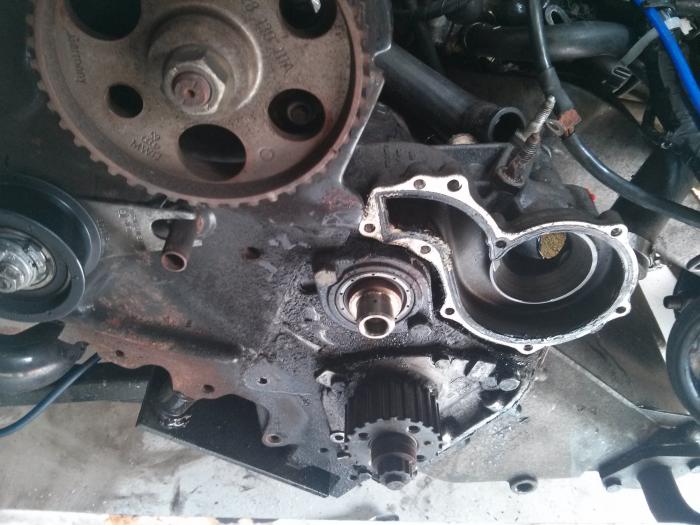
A nearby VW parts supplier was found, but to be sure we got the correct pump, he suggested we remove the existing water pump and bring it along for comparison. So we set about removing the water pump, but somewhere along the line deviated from the plan. I had read, and been told, that it is possible to remove the water pump on a 1z engine without disturbing the timing belt. It is possible, but you need to remove the whole assembly (including disconnecting the hoses). For the record (it’s easy when you know how!) to remove the water pump on a 1z engine without removing the timing belt:-

  • disconnect the battery (for safety reasons)
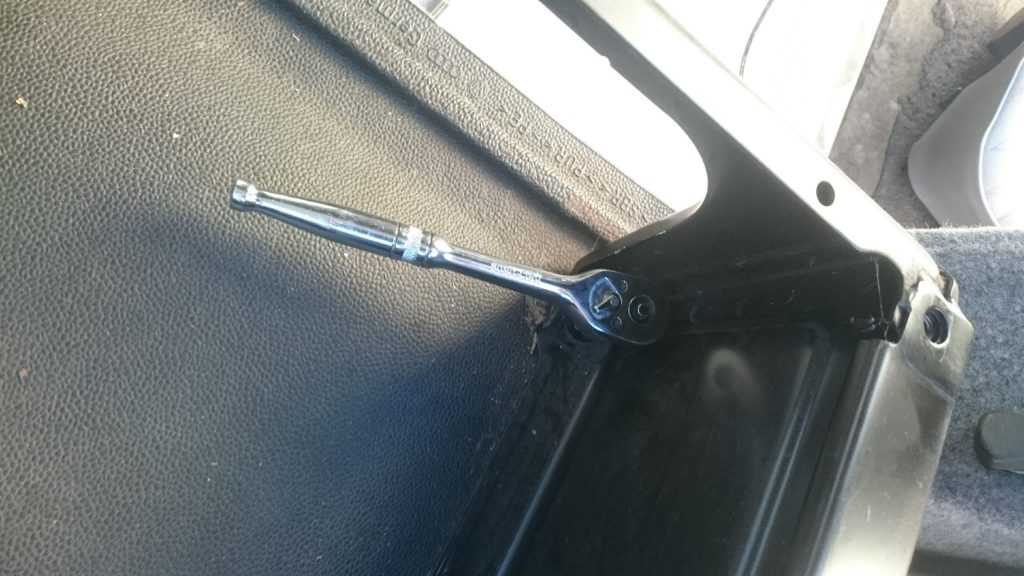
  • remove the auxiliary belt (rotate the tensioner arm with a wrench until the belt goes slack)
  • remove the alternator, and the mount/bracket that it is bolted to.
  • disconnect the hoses from the back of the water pump assembly (obviously coolant will go everywhere when you do this, so be prepared!)
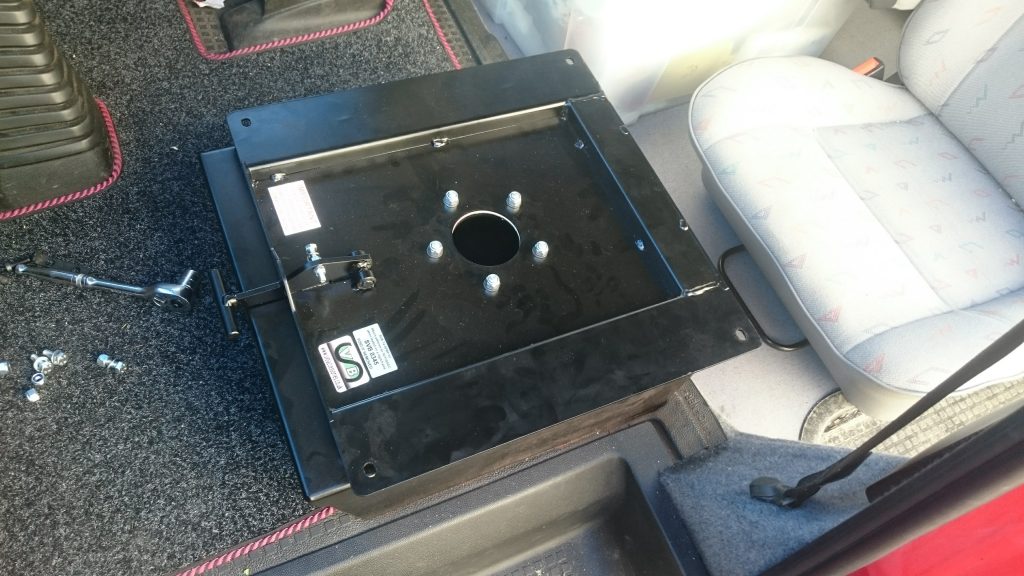
  • remove the four bolts/ studs on top of the water pump assembly
  • you can then remove the assembly and detach the water pump and front plate from the housing

1Z waterpump fitted

However, we missed some key info here and ended up removing the timing belt. If you remove the timing belt, the water pump and the front plate can be separated from the water pump housing without removing the alternator etc. As water pumps are usually replaced at the same time as the timing belt, most people do it that way, but be warned – fitting a timing belt is a tricky job and an engine can be seriously damaged if the timing is out.

worn waterpump impeller

detached impeller

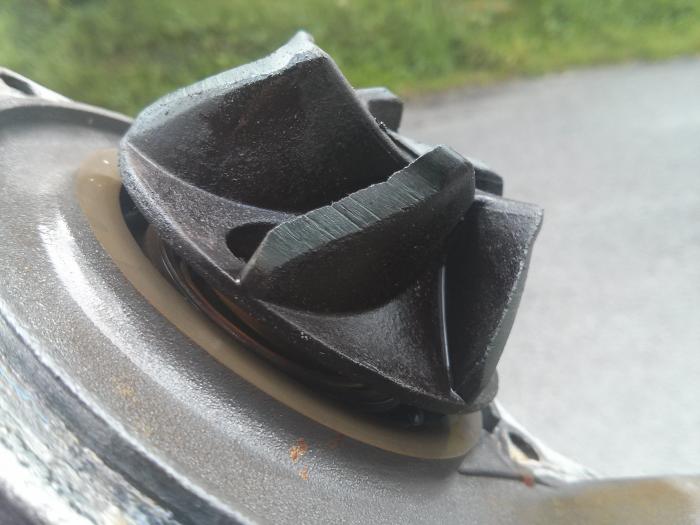
Once removed it was evident that there was a problem with the water pump – the plastic impeller showed signs of wear, so it must have been making contact with something, and we then noticed that the impeller could be rotated on the shaft (and easily removed, once out of the housing). This explained the intermittent nature of the overheating – sometimes the impeller would catch on the shaft and therefore be pumping correctly, other times it was slipping on the shaft and struggling to pump at all.

new waterpump ready to be fitted

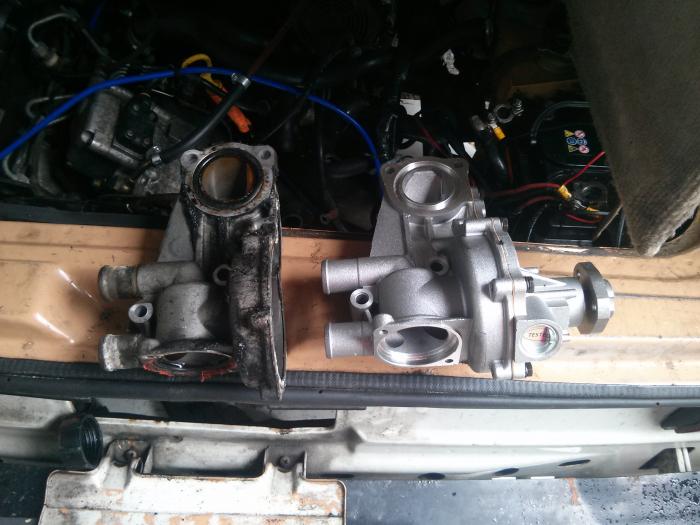
The water pump was replaced with a new one – the whole assembly, as this is what the supplier in the nearby town had on the shelf, it was a bank holiday in france the next day and we needed to make our way back to the UK sooner or later! I’ve since thought about this, and realised that a potential “get us home” fix if we couldn’t source a pump, could have been to araldite the impeller back onto the shaft.

using bolts to help with timing belt tensioner

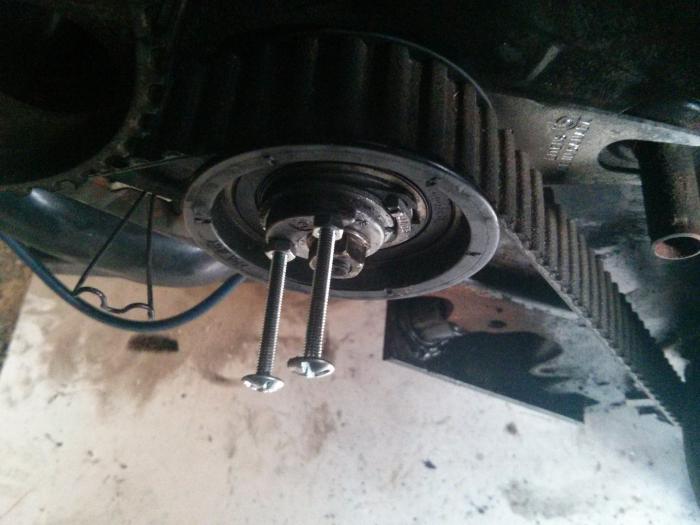
Next we fitted a new timing belt. We didn’t have the correct tools or time to source them. Notably missing was a timing belt tensioner tool. John came up with the ingenious solution of tapping (creating threads in) the holes in the tensioner so that we could screw in a couple of 4mm bolts. These bolts could be held by a wrench or pliers to rotate the tensioner and tension the belt.

The next challenge was timing – despite our best efforts to mark up the old belt and pulleys with paint marks, the timing was slightly out on first attempt, so that the engine wouldn’t start. We consulted the internet (youtube videos of processes such as these are gold-dust) and then went through the full timing set-up from scratch – we removed the rocker cover and locked the camshaft at Top Dead Centre (TDC), using a steel shim and some feeler gauges. We located TDC on the flywheel – my 1z conversion uses a JX flywheel and the TDC mark is actually on the clutch pressure plate – an arrow that can be found between two lugs. This can be spotted through the inspection hole on the bell housing, and needs to be lined up with a pointer on the housing. This can be locked in place by putting the van in gear.

fuel injection pump pulley

The bit that threw us was the fuel injection pump – this can be locked in the correct position using a tool pushed through the smallest hole on the pulley. We used a socket handle with tape to shim the difference in the size of the hole in the pulley and the corresponding hole in the plate behind. There was too much play, so first attempt again, the engine wouldn’t start. I should add here that before trying to start an engine with a new timing belt, always crank the engine over manually (using a socket on the crankshaft cog – take the engine out of gear and turn for two full revolutions), to check for any mechanical resistance – which would indicate something seriously out on the timing, probably leading to a very broken engine if you tried to start it like that.

Anyway, there is probably a whole blog post to be written on this process, and one that should be written by a mechanic rather than me! To cut a long story short, after a couple of false starts (fuel injection pump one tooth out) we succeeded in fitting and tensioning the new belt and the engine starting on the button as it should.

So then onto the test running – I was still running without a thermostat (to be replaced before running in cold UK winter temps), and the temperature now stayed right near the bottom of the gauge however it was driven, so we confidently concluded that the overheating issue was now solved! We could happily have stayed with John for much longer and got to know the area better in a more relaxed way in our now cool-running van, but we had already been there five days at this point and time and money constraints meant that we needed to start heading north.

John suggested a great municipal site at Spay, near Le Mans as a good “halfway point” and phoned ahead for us to check we could get in after hours. That leg of the journey was fantastic, as I started to relax into driving without checking the temp gauge every few seconds. The campsite was great, just as described and we relaxed into our penultimate night in France.

We had booked a very early morning eurotunnel crossing the day after next as it worked out much cheaper than travelling at peak times and at the weekend. On the trip to Calais we had to stop several times when the intercooler hose came off yet again, but the temperature stayed very low. On arriving at Eurotunnel terminal, the machine offered us a midnight crossing at no extra charge, so rather then sleeping in the camper in the carpark as planned, we had only a short wait before boarding the shuttle train.

We then drove back to Bristol through the early hours without incident and parked up at about 4am, and spent our first night in a proper bed in nearly a month!

Ironically back in the UK Rocky is now behaving perfectly – I took some time to clean up and properly clamp the intercooler hoses, and tighten the mounting. I decided to take it off the road for a few months to give the body work some TLC and sort out a few other bits and pieces in time for spring. I don’t really want to take it off the road for the whole winter, but time and money constraints mean that I don’t have much choice, so Rocky us now resting up in a friend’s warehouse for the winter.

Rocky in the warehouse