Rick Hurst Web Developer in Bristol, UK

Menu

Category: vw t25

Bristol Volksfest 2013

sun setting behind Rocky the VW T25 parked up at Bristol Volksfest

A couple of weekends ago we headed over to Bristol Volksfest as it was on our doorstep and the weather was good, so it seemed rude not to really.

Great weekend, great vibe, even if we did make the slight mistake of squeezing into the family camping next to the noisiest family on the site (but hey, it was a festival!) – next time I think we’ll take our chances with the party animals in the general camping!

Enjoyed looking around the arena, bought another vintage deckchair and a vintage windbreak, looking at interiors and paint-jobs of other people’s vans to get ideas of what we might do to Rocky in the future.

On the sunday, rather than join the queues to leave the site, we drove into an empty spot in the general camping and chilled out with a cup of tea and enjoyed the rest of the sunshine.

Another sunny North Devon weekend (well, mostly..)

Rocky the T25 in a sunny devon field

We lucked out again with a sunny bank holiday weekend in North Devon, chilling out with friends in a field and on the beach for a couple of days, before they had to head off on the Sunday.

We got to try out the new funky leisure canopy, and it worked really well, although I have since noticed (from looking at the pictures on that web page) that we forgot to add the pole extensions which would have made it a bit higher. We also managed to burn a couple of small holes in it, with sparks from our nearby fire – something worth bearing in mind!

Despite rain being forecast for the monday, we decided to sit it out rather than head home – setting up the van for a day of film watching, tea drinking and board game playing. It was worth it for the sunny tuesday morning parked up at putsborough beach for some skim-boarding and more tea drinking!

The 1Y engine is still going really well, though i’m a bit concerned about the amount of oil it is using – there’s no smoke or leaks, but there are drips from the top of the dipstick when running which end up splatting up on the tailgate. This could be from overfilling – the short dipstick means that i’m constantly topping it up so that I can get an idea of the level, which only just appears on the end of the dipstick when full. I can’t always check it on level ground, so am potentially overfilling it each time. A custom dipstick is on the cards – when the level is low I need to know exactly how low, so I can properly monitor it.

Instructions for fitting a T25 swivel seat plate from Just Kampers

Seat swivel base from Just Kampers, being fitted to a t25 camper

First a disclaimer – I am probably one of the worst amateur mechanics out there, follow my advice at your own risk! These are not official instructions, just the method I used through trial and error…

I ordered a T25 Seat swivel plate from Just Kampers, and was confused to find it came with no instructions whatsoever. I wanted to have some idea of how long the job would take, and what work would be involved so started searching the forums. I found some fairly contradictory advice, but was pleased to read that it is a fairly simple job. Basically the plate has seat runners on the top, which the seat attaches to. The bottom of the plate bolts to the top of the existing fixed runners in the van. No welding required. Here are the steps I took to fit it to the passenger side of my T25:-

  1. Remove the seat
    Slide the seat forward as far as it will go, then locate a little lever that stops the seat running all the way off the tracks – with the lever disengaged, it can be slid straight off the front – I had a bit of a fight with the glove box at this point – it might be better to remove the glove box before doing this?
  2. Sit the plate on top of the runners and locate the holes
    The lever used to lock/ unlock the swivel goes at the front. Unlock the plate and swivel it round so you can access the holes at the back. This confused me at first, I was convinced that i’d need to separate the top and bottom plate to allow access to the holes at the rear, but by rotating it to about 45% (as shown in the photo you can clear one set of the rear holes at a time.
  3. Time to get out the drill?
    The T25 only has one set of holes at the rear, but the plate has two – apparently this is because the T2, which this plate also fits, has four holes at the rear?. Some people on the forums suggested just using two rear bolts, others suggested drilling out the second hole so you can fit four rear bolts. I went with the latter, the more bolts the better. I found I needed to widen the existing rear hole slightly (in the runner, not the plate) to allow the bolt through. The rear four bolts are larger than the front – don’t widen the holes at the front of the runners
  4. Slide the provided nut + plate under the runner at the rear
    Line up the nuts (which come attached to a steel plate) with the holes, the rear bolts can then be tightened up.
  5. Slide nuts under the front of the runner, and put the front bolts in
    It looks like it is is possible to get four bolts in the front. I’m tempted to add the other two, but as the front nuts do not come attached to a plate like the rear, I think it might require improvising to get the second front nut back to where the hole is – maybe gluing a nut to a small strip of cardboard so it can be pushed under and lined up with the rear of the front holes?
  6. What to do with the under-seat compartment door?

    Seat swivel base stops the battery/ under seat compartment door from opening and closing
    Once the plate is bolted in place, it isn’t possible to open or close the battery/under-seat compartment door. You could have it permanently closed, or half open. Having it permanently closed would obscure a very handy storage compartment, so I chose to remove mine, which required drilling out a few rivets.

  7. Grease the runners, before putting the seat back on

    Seat swivel base with seat fittedThe handy thing about it being a swivel is that the plate can be rotated to a more convenient angle for putting the seat back on,so you don’t have to squeeze it in against the glove box. Remember the little lever that stops the seat flying off the front also stops it going back on again, so disengage that when the seat stops.

A windswept Vanwest 2013

camping in our T25 at vanwest 2013

Last weekend we went to our second Vanwest event at Brean sands. Unfortunately we didn’t get the previous weekends amazing weather and it was ridiculously windy, with frequent rainstorms. I didn’t get a chance to try out our new canopy/ awning as it nearly blew away while I was trying. Our Quechua base seconds also nearly flew away when the pegs worked their way loose – before we got the van, we managed to camp in many a wind storm without that happening, so it’s safe to say it was definitely very windy!

The gale force winds were a good test of how feasible it is to use the Devon side elevating pop-top in strong wind – at one point I shut it, worried at how much the canvas side was bending in. I wondered if i’d have to test out the contingency plan of making a bed across the front seats for our 9-year old son. However after turning the van round so that the back was facing the wind, it was much less of an issue, so with a couple of pieces of wood wedged in and cable-tied in place, the upstairs bed was fine to use.

We spent a lot of time hiding away in the van watching films, listening to music and drinking tea – pretty much the same as we would have ended up doing at home in Bristol on a rainy weekend. Between rain storms we headed down to the arena and had a nose round the “show and shine” vehicles and stalls, picking up a vintage deckchair and LED reading lamp, amongst other things.

A good fun event – just a shame that the bad weather dampened the BBQ/ socialising vibe!

Idyllic bank holiday weekend

Rocky the VW T25 parked up looking over Putsborough Sands

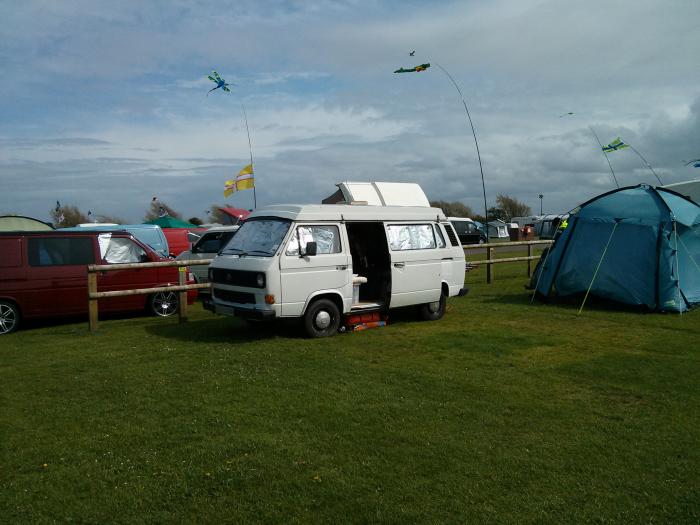
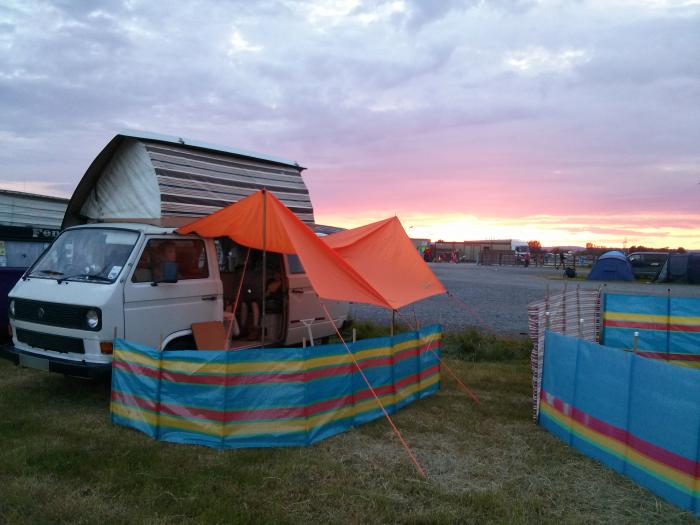
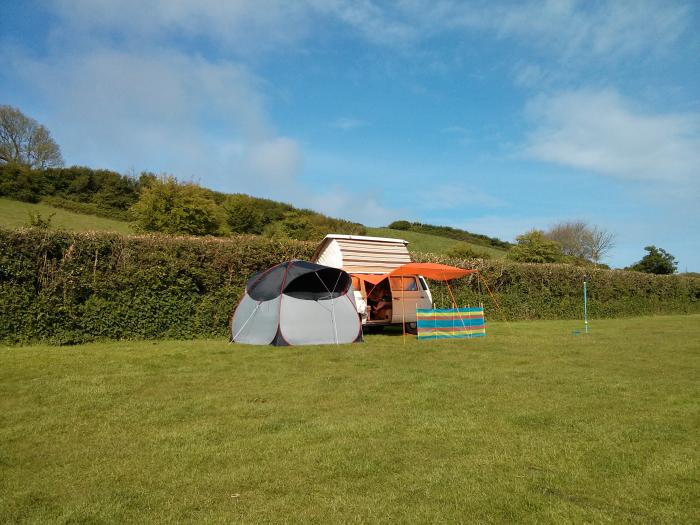
This is exactly what I had in mind when we decided to buy a camper van. A rare coincidence of fantastic weather and bank holiday weekend in the UK. Camping at our favourite “secret” Devon camping spot with friends, the first time there in Rocky, our T25 camper, surfing and lazing around in the sun.

We left on friday night, fully aware that we may get snarled up in bank-holiday traffic, but it actually turned out to be not too bad. This was the first proper road test for the new engine – fully laden camper and a motorway run before taking on some of North Devon’s finest A-road hills. The 1Y engine handled it all with no complaints, with no sign of overheating or (excessive!) smoke.

We arrived at the camping spot before it got dark. We made some new friends, who kindly shared their fire and wine, as we weren’t really prepared with these necessities!

The next day we got some time to work out what other kit we think we need for longer camping trips, what works and what doesn’t work. I got the 3-way fridge working on gas, which is ideal for spots like these where there is no electric hookup. I think for longer trips where there is hook-up, we’ll also take our powered coolbox, as there isn’t exactly much room in the fridge.

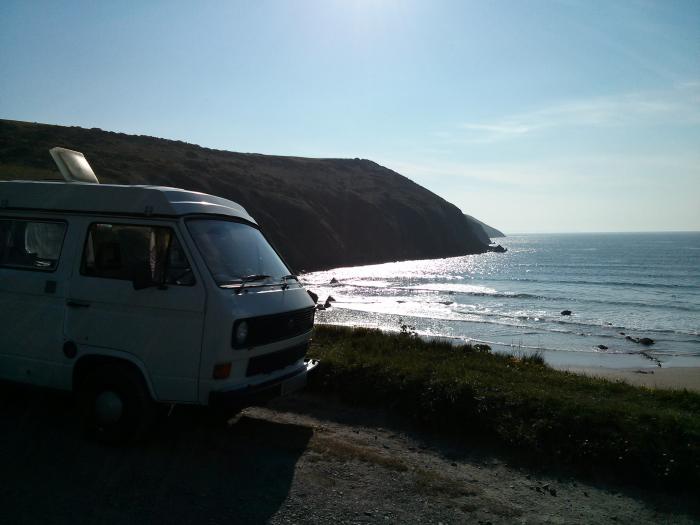
On the last day, we took Rocky down to the beach car park at Putsborough and were lucky enough to grab a spot overlooking the beach. It might be a bit of a cliche, but being able to sit in the van having a coffee, with the music on watching the sunset, really is living the camper van dream. If only overnight camping was allowed in that spot! There are a few camper van overnight spots at the back of the car park, which we might try another time.

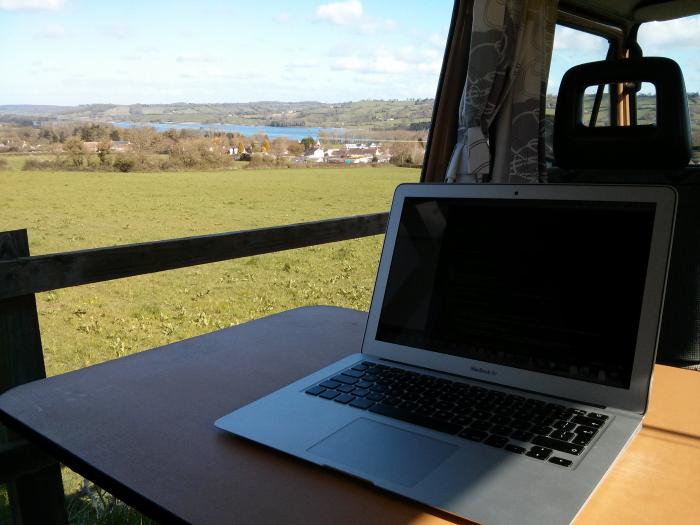
One thing we did decide that Rocky would benefit from is window tints in the rear – although we have curtains and thermal blinds, it takes quite a lot of effort to make the van private enough to quickly get changed at the beach. I’ve also had that “being in a goldfish bowl” feeling when I use the van as a mobile office – it would be good to make it so people have to make more of an effort to be nosey.

The run back saw us caught in the predictable bank holiday traffic jam. Looking on the bright side this was a good chance to see if the engine cooling system works properly – which, i’m happy to say, it did. Being stuck in traffic is always a pain, but so much more bearable if you aren’t worrying about the engine overheating, have some decent tunes on the stereo and cold drinks in the fridge!
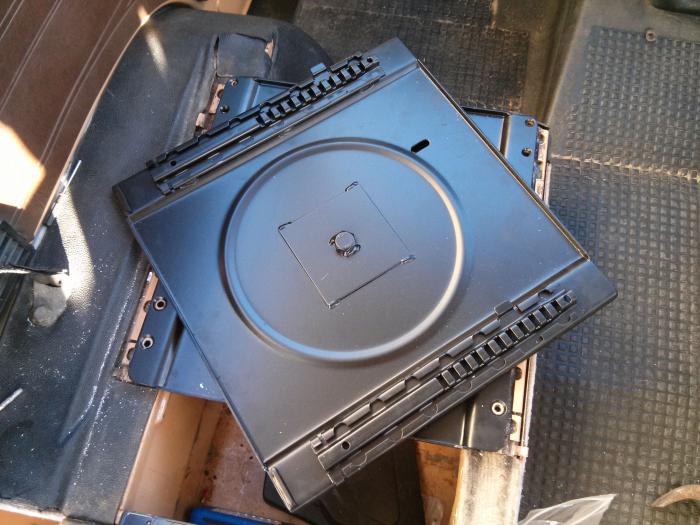
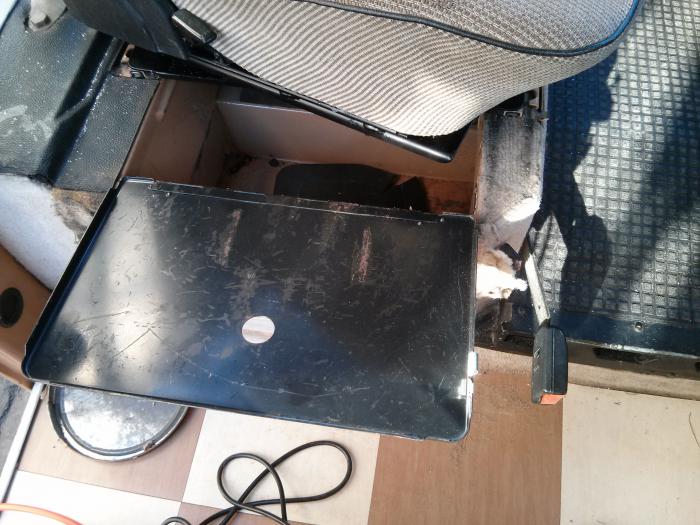
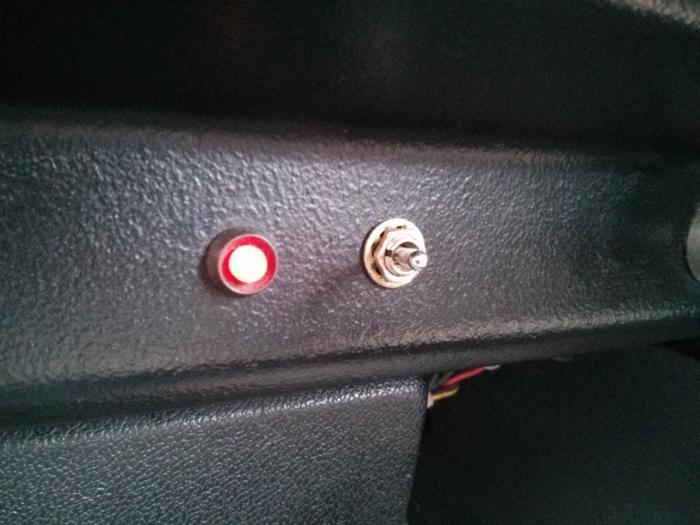
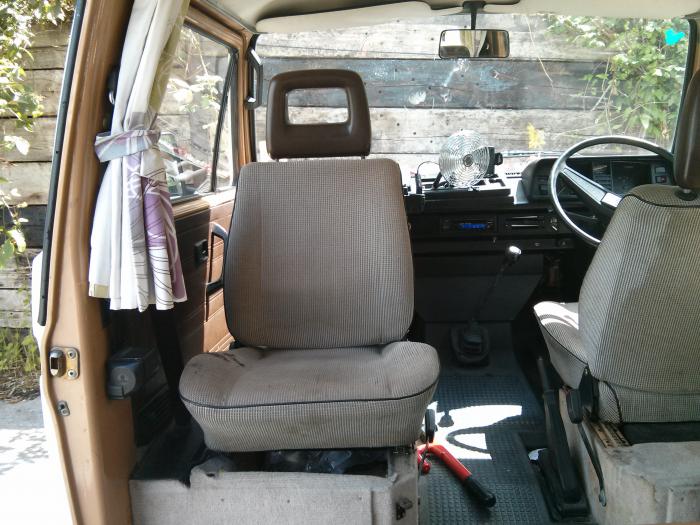
VW T25 Mobile Office

office with a view - my VW T25 mobile office!

After years of working from tents and the passenger seat of a VW Beetle, I finally have a luxury mobile office! Before you get excited wondering what technical wizardry i’ve added to Rocky, so far all i’ve needed is my laptop and the table. The picture above is a bit of a “lie” – the spot is in a car park just across the road from one of my clients. I had a decent wifi signal so could do work on the office network without needing a VPN. Although I have a couple of solutions – a mains inverter and a DC-DC transformer – for keeping my macbook air charged from a 12 volt socket, I hadn’t got either with me, and had somehow managed to start with only a 50% charge. When it got too low after a couple of hours, I scurried back into the office and plugged back into the mains.

While it lasted I had an office with a beautiful view over Blagdon lake, a coffee pot on the stove, decent sound system (i’ve wired in a couple of old hi-fi speakers under the back seat as an experiment) and comfy seat to work from in my new T25 mobile office. Predictably, i’m now researching solar panels, leisure batteries (Rocky already has one, but a second one would be good) and other tech such as wifi antennae and 3G signal boosters to kit Rocky out for some more off-grid mobile working adventures.

Later the same day, I got to use Rocky as a mobile office again – with an hour and a half “downtime” to use while my son was at gymnastics, I sat and got some work done in the sunny car park. It turned out to be very productive, stopping only to fit the new Fiamma bike rack that arrived yesterday, and a well-deserved cup of tea or two of course…

Bodywork almost done!

Rocky the T25 after paintwork touch up

Although this is far from a professional job, it’s a massive improvement on the brush painted grey primer, rust streaks and patches Rocky had a couple of weeks ago! There are a few more spots to do, and it could do with another coat in places. In the picture above it doesn’t look too bad – but the close up it’s a bit of a patchwork of different shades of white. Hopefully however the work i’ve done will keep the rust at bay for another year or two, at which point we might get a professional to sort it out and change the colour.

More importantly, we can now get on with the summer adventures!

Bodywork spruce-up

sorting bodywork on Rocky the T25

So Rocky has now passed his M.O.T., but after picking him up from the garage I only drove a few metres before attacking him with a drill-mounted wire brush!

When we got Rocky at the end of last summer I spent a few weekends sanding and treating rust patches before painting on some anti-rust primer, with the intention of spraying on a top-coat of enamel paint at a later date. Then winter thoroughly set in and it has been too cold and wet to do anything eversince, and I knew the rust would come back through.

Luckily i’ve now got some space in a friends warehouse for a week or two to store Rocky undercover overnight, so I can work on the bodywork and get it out of the rain/ overnight dew.

I removed the flap that covers the sliding door rail, to reveal the worst area i’ve found so far on the van, and the cause of the annoying rust streaks that appear over the rear wing. Everywhere else has turned out to be not too bad considering – a few small holes, but nothing that a bit of filler won’t sort.

The rear bottom panel is also in a bit of a sorry state, as well as being rusty I think it has been pranged at some point.

One day we’d like to get a full professional respray, including proper restoration and panel replacement where necessary. We haven’t got the budget for that right now, so i’m relying on the fact that Rocky is currently a patchwork of different shades of white to allow me to touch up areas myself with a rattle spray can.

The WTF switch

WTF switch on our VW T25

Does your camper have a WTF switch? Rocky has three – two on the dash and one on the outside of the wardrobe. Having a vehicle several decades old means that various modifications have been made by previous owners, that aren’t necessarily documented.

I’ve managed to work out what two of my WTF switches do – precisely nothing! No mystery wires attached, their one-time purpose lost to history. The third, a small toggle switch near the heater controls, still remains a mystery – it also has a mystery LED next to it – the LED is sometimes on, sometimes off, but the switch has no effect on this, and no other noticeable effect on anything else.

I asked on a web forum if anyone had any idea what it might be for – sarcastic suggestions included “next door’s doorbell?”. I haven’t had the opportunity to test that theory yet!

Of course i’ll never really know until i’ve removed a few bits and pieces and traced the wires to see where they go. I suspect it might be related to the leisure battery, but that’s a guess, so one day I will work it out. Until then I haven’t got a clue WTF it is..