Rick Hurst Full-Stack Developer in Bristol, UK

Menu

Category: remote working

Building a minimal VW T6 campervan (twice)

A while ago, I wrote about minimal campervan conversions – i.e. what is the least you can do to call your van a campervan? In 2023, I found out for myself.

I had a tight deadline, and limited budget to get something ready for a European road trip with my wife in the summer. So with very little time, I had to get a campervan road-trip ready.

The base van

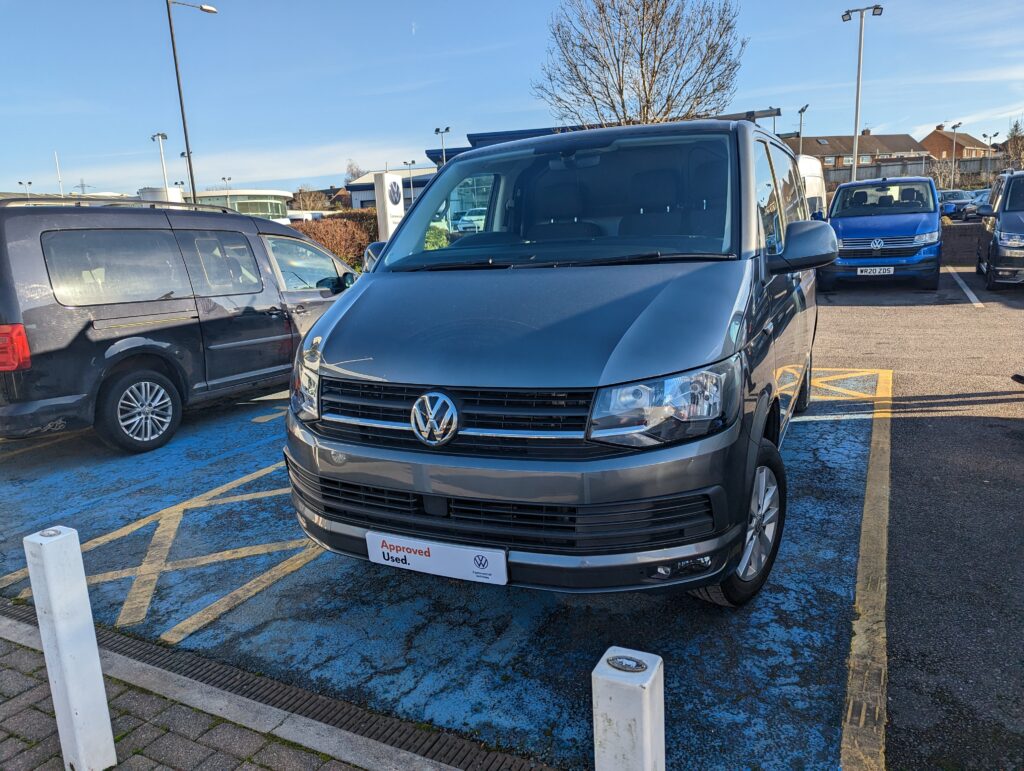
Having owned several old campervans which I’ve spent as much time crawling around underneath as I have driving them, I put most of the budget into a decent base van. I started with an “approved used” 2018 VW Transporter T6, which came conveniently ply-lined. This was absolutely key: it meant I could screw things directly to the ply without worrying too much about structural support or damaging the van itself. Drilling in to the metal of a van is not for faint-hearted, so being able to avoid that for most of the initial build is very handy. 
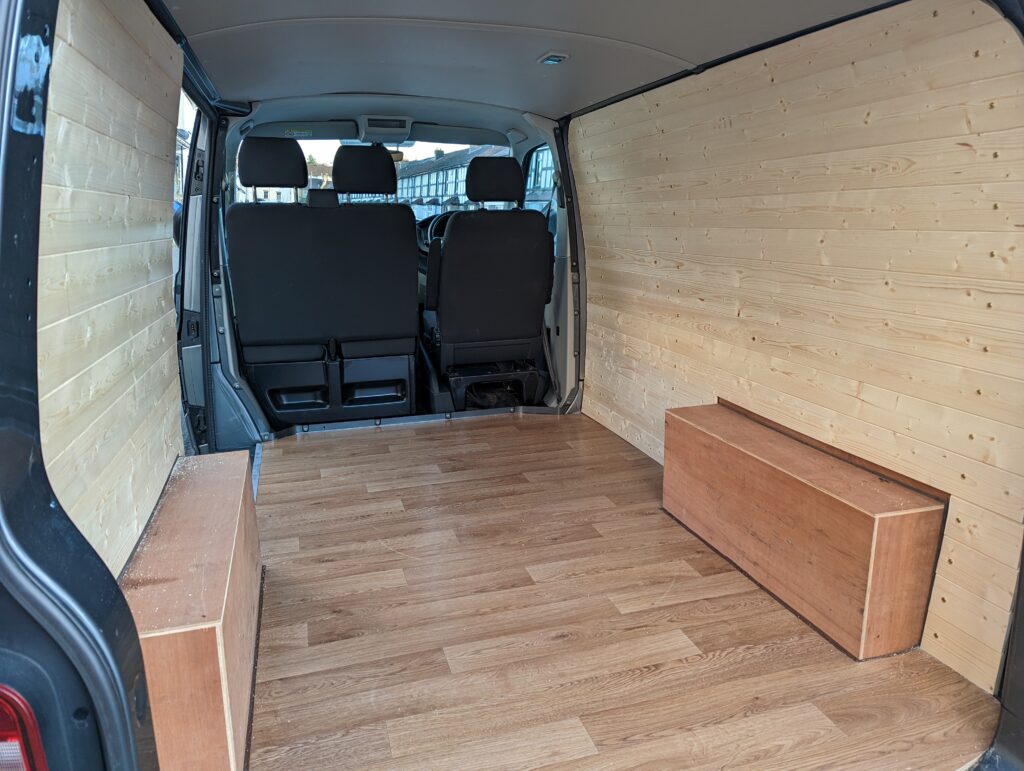
The first job was to remove the factory bulkhead, which simply unbolts, though this does leave a lip along the floor, which needs to be removed if you want to fit a rotating seat (more on that later).

With the bulkhead removed, this was my starting point:

Flooring and tongue-and-groove cladding

Thanks to the existing ply-lining, installing tongue and groove cladding on the walls was a breeze. I just cut it to size and screwed it directly into the ply with short screws. The flooring is wood-effect vinyl which is laid directly onto the ply-lined flooring, cut to shape and lightly glued down with contact adhesive.

I left the factory-fitted ceiling in, knowing that at some later point we would want a pop-top roof fitted.

The bed

I found a brilliantly simple pull-out double bed design featured in this YouTube video. I loosely copied it, using 2×4 section wood and IKEA bed slats for the base. The main structure is screwed to ply of the wall and floor. The pull-out section isn’t attached in any mechanical way, it just sits there by gravity. But thanks to the weight and friction, the pull out part stays put. It’s been brilliant, and I’d use the same design again – maybe with thinner-section wood for the main structure to save weight – it’s somewhat over-engineered!

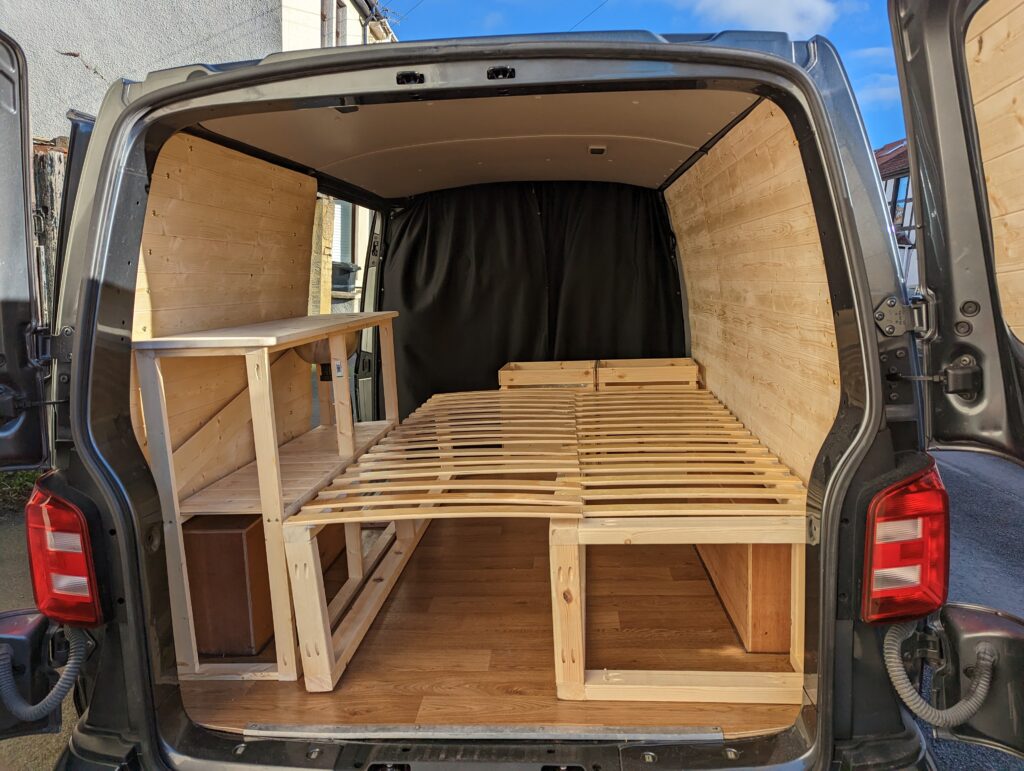
This was the project that convinced me to buy a pocket hole drill. Game-changer. It made everything sturdier, faster to build, and more professional-looking than anything I’d done with wood before.

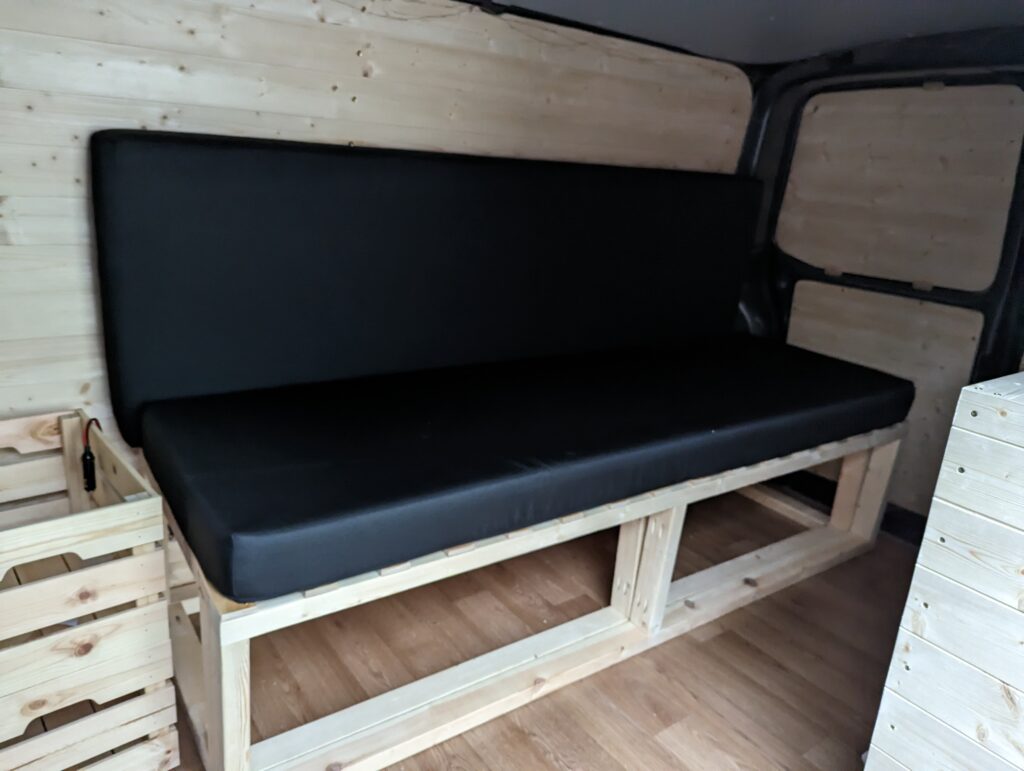
For the mattress, I had two foam sections custom-made, topped with a layer of memory foam and upholstered nicely. It was one of the pricier parts of the initial build, but worth it for the flexibility – bed by night, sofa by day.

Storage and kitchen unit

I also threw together a compact kitchen unit using pine shelf from Wickes for a work top. For the sink, I went ultra-minimal: a stainless steel salad bowl that already had a plug fitting. Drainage is handled by a 10L container, and I used a 12V submersible pump feeding fresh water from another 10L container into a standard domestic mixer tap. A switch drives the pump – the tap just needs to be left open for water to flow. No hot water in this version!

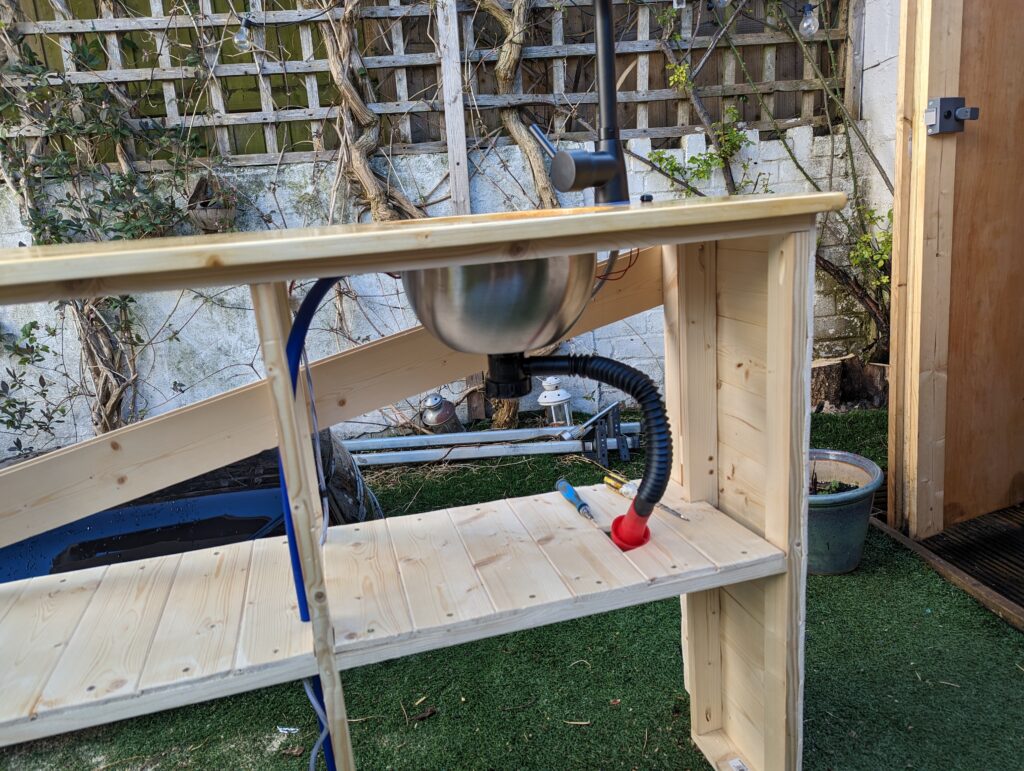
The plumbing was… let’s say “experimental,” but after a few false starts it works. If I did it again, I’d use proper adapters for connecting camper-style plumbing to standard taps.

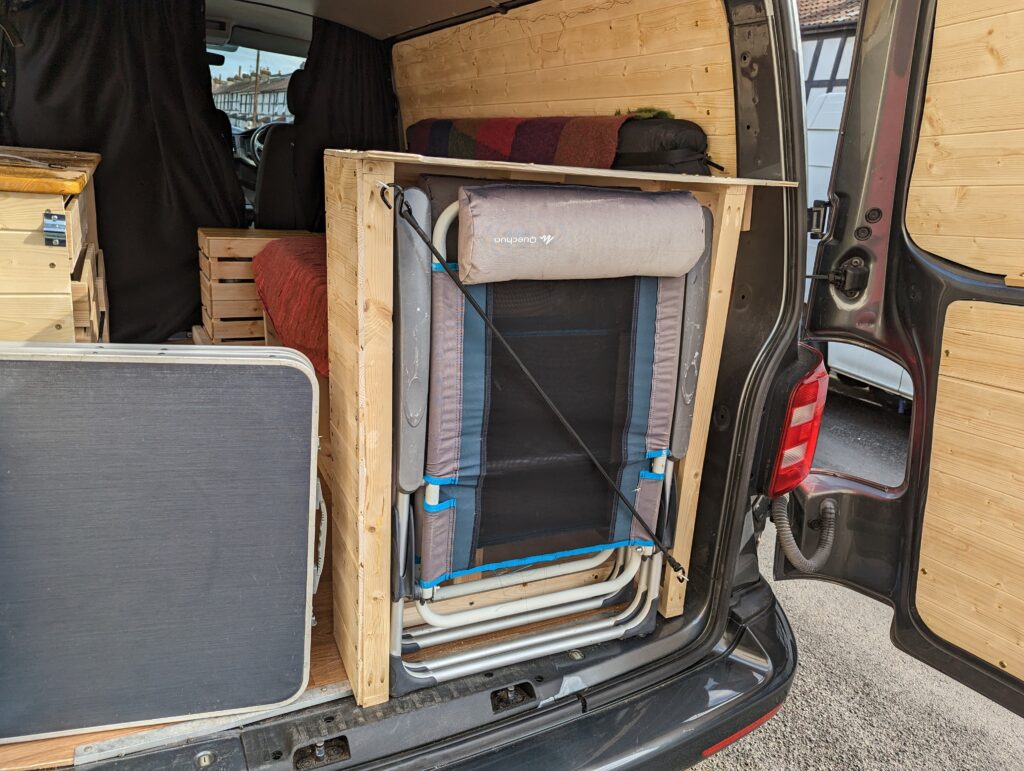
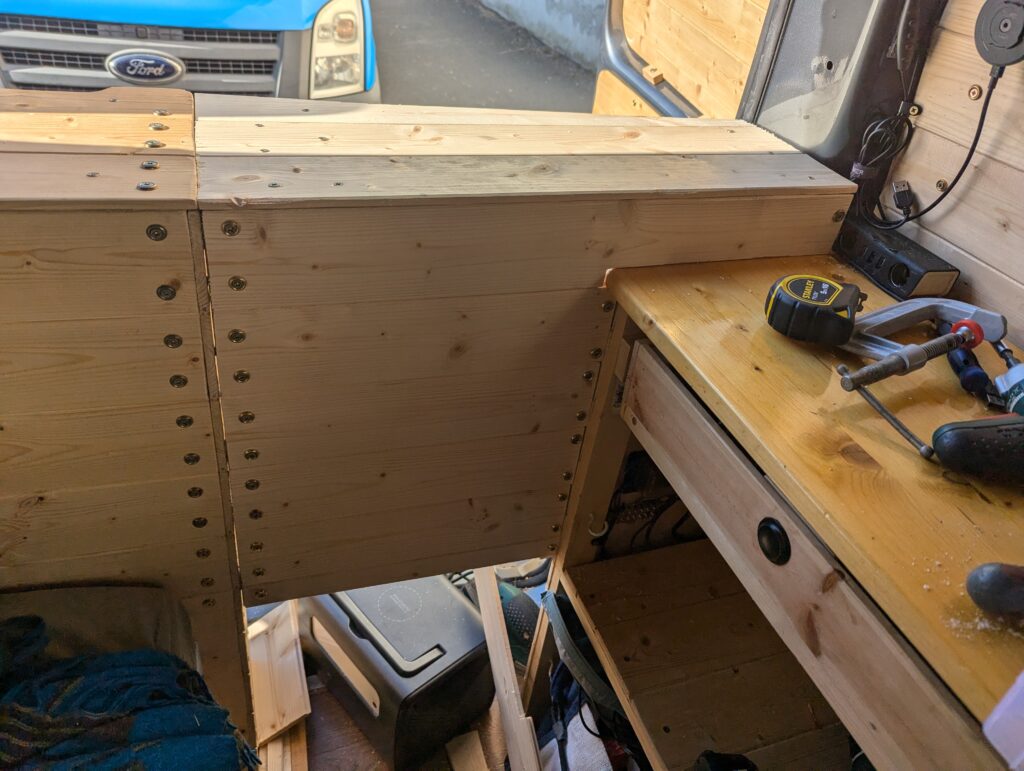
Next, we needed a headboard, and some storage to fit our Decathlon chairs. The headboard served as both.
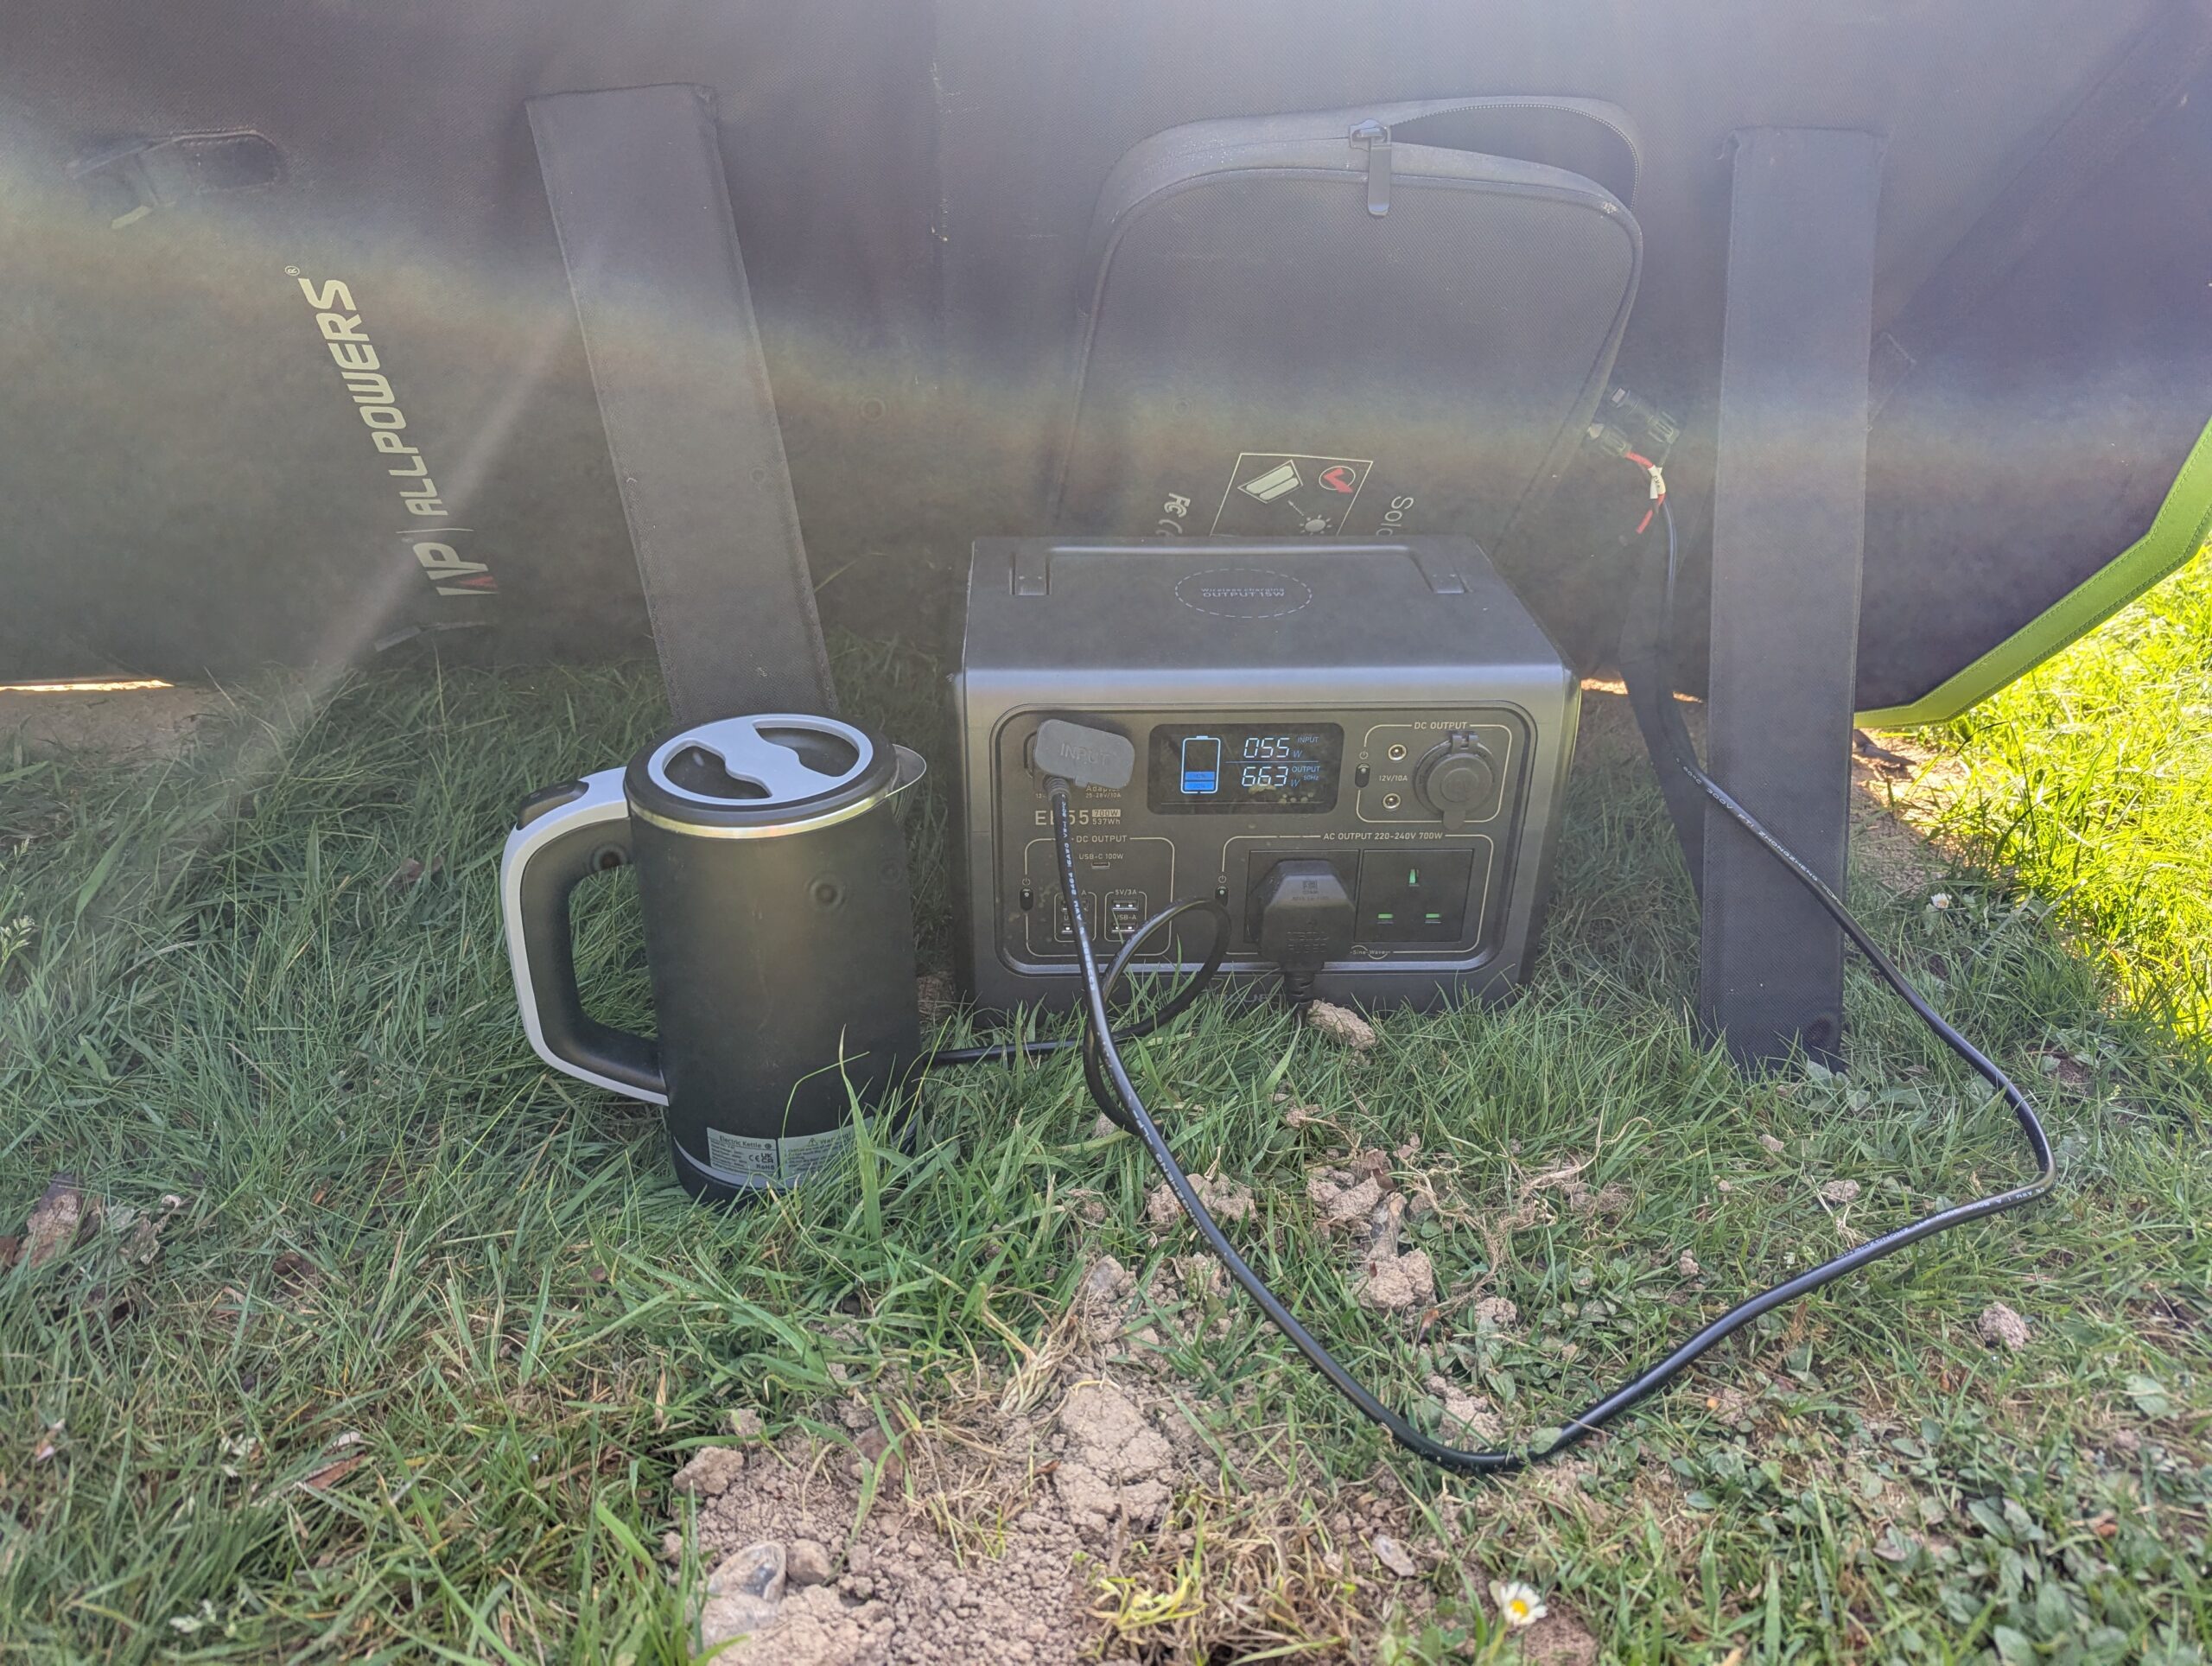
Power and fridge

With no time to fit a proper electrical system, I relied on my Bluetti EB55 portable power station, with off-grid runtime extended via a 200 Watt portable solar panel (see this earlier post for more on those). It is enough to run the tap, some lights, and a Dometic 12 volt compressor fridge mounted at the foot of the bed. The electrics really are basic – a simple fuse box mounted to the wall under the bed which feeds the lights, fridge, water-pump and some 12 volt and usb sockets. This is fed by a single 12 volt plug plugged into the bluetti. It has a 10 amp limit which I’ve not yet reached, and the wires do not get hot.

Cooking – portable camping stoves

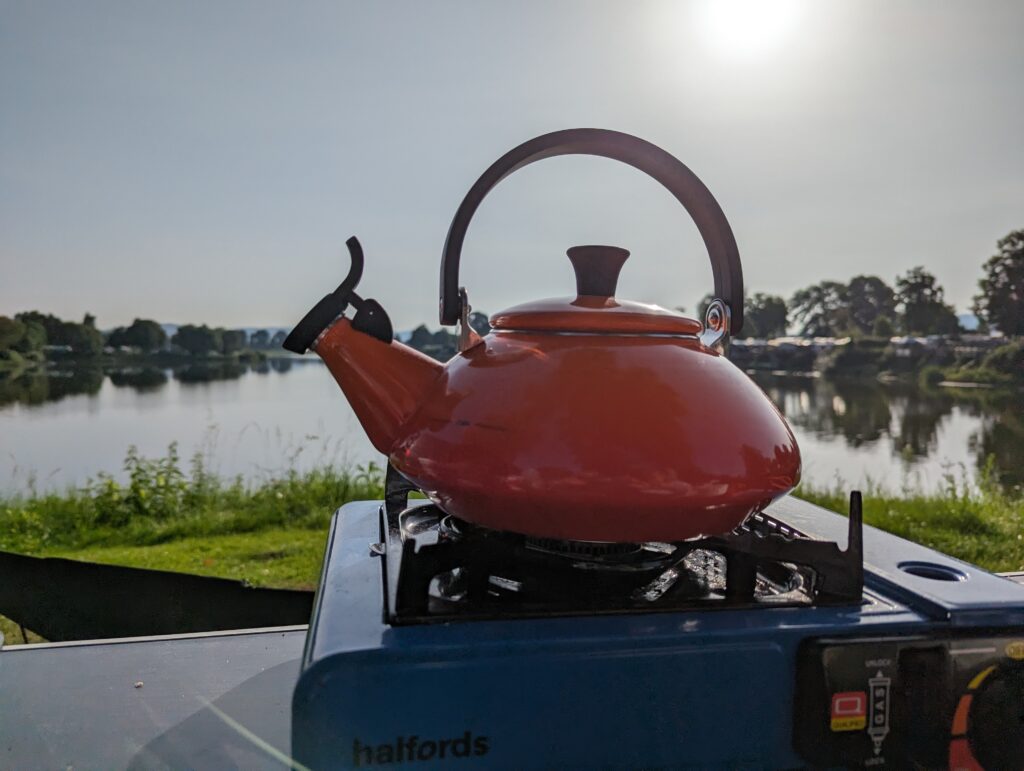
For this initial minimal build I didn’t want to build in a permanent cooker or mess around with gas plumbing, so cooking and kettle boiling was taken care of by a pair of cheap halfords camping stoves, the type with the disposable gas canisters.

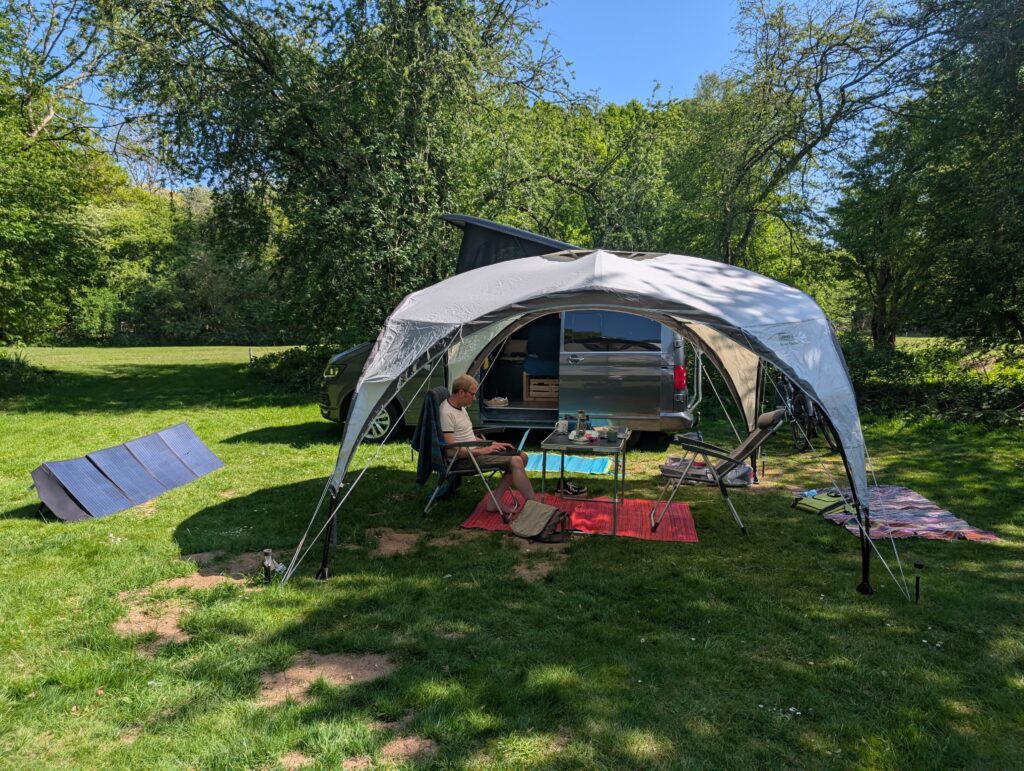
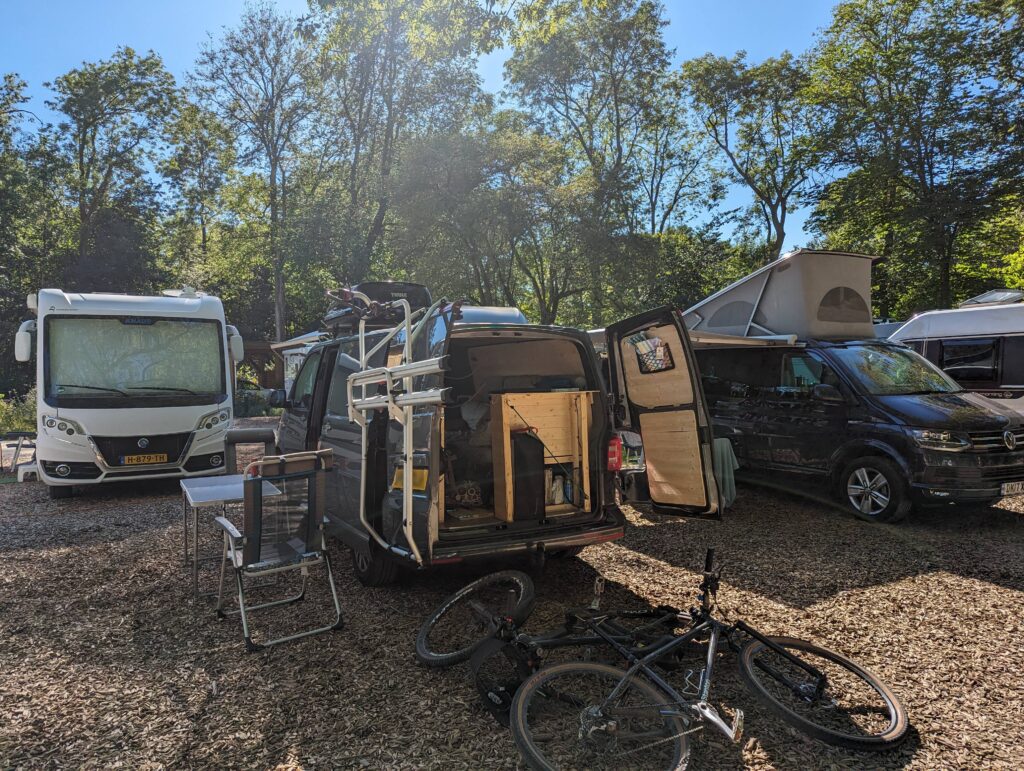
Add in some cab curtains for privacy, and that was Version 1 of the van, ready for Berlin and beyond.

A successful first trip

The trip was great. The setup held up really well, but showed it’s limitations during a 24-hour rainstorm in Copenhagen when we were cooped up too long inside in a windowless van, with only some USB fairly lights for lighting. And so we started planning phase 2!

Upgrades: version 2

Two years later, with a bit of budget and time, I booked the van in at Skyline Roofs to have a pop-top fitted.

We also asked Skyline to do a few other jobs:

  • Install a swivel base on the double passenger seat.
  • Fit flush opening side windows (which we supplied).
  • Fit some 12 volt LED downlights with switch.

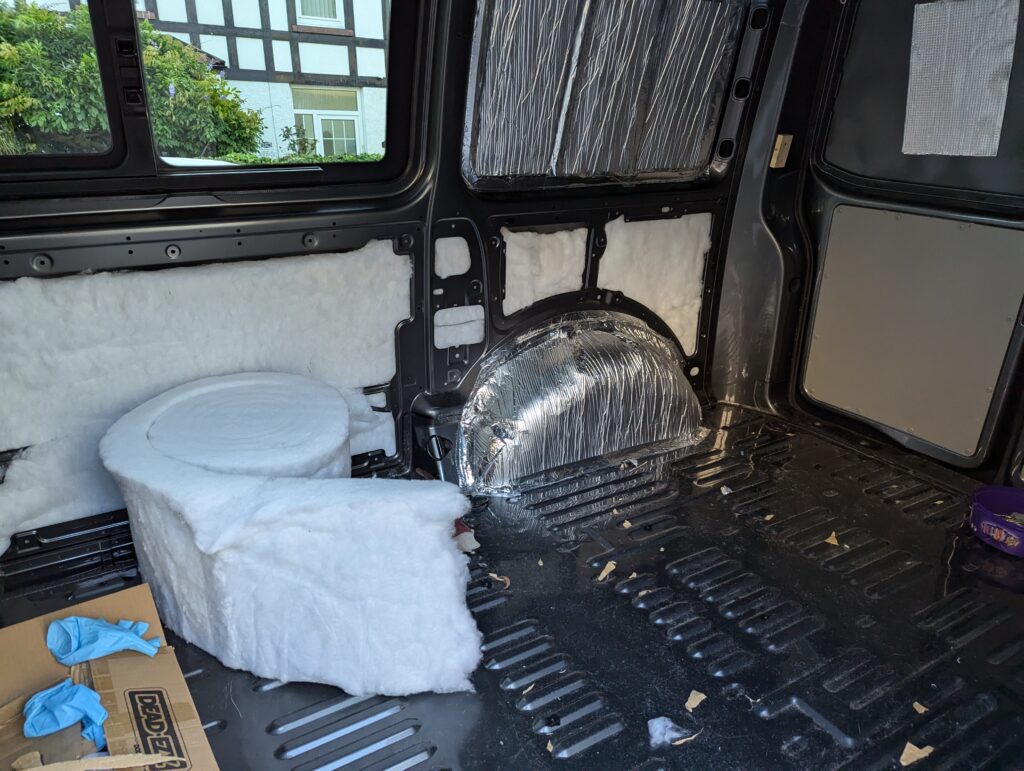
With these upgrades on the way, I stripped the van back to the bare metal—everything I had previously built ended up in our dining room temporarily.

In the photo below you can see the metal lip running along the floor and up the B pillars behind the seat bases, which the bulkhead was previously bolted to. Removing this lip requires drilling or angle grinding the welds – a job I left to the pros at Skyline!

This was a great opportunity to:

  • Clean up the interior.
  • Apply rustproofing to the screw holes from the factory ply.
  • Add sound deadening and some insulation.

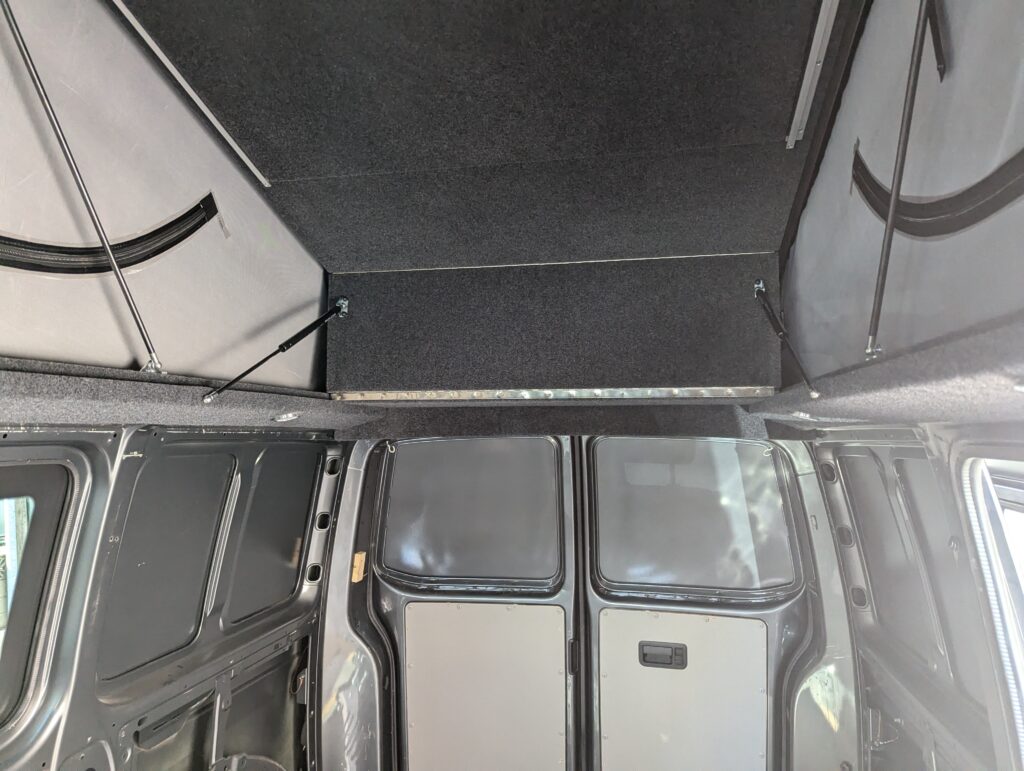
We went for a hinged bed board in the roof, which adds standing room almost all the way to the rear.

The insulation dilemma

Insulation is a hot topic in the van world, with strong opinions and loads of conflicting advice. Our experience? The van worked fine without it. Many factory conversions like the VW California don’t include insulation (not sure if that’s true for all versions), relying on (inefficiently) heating the van instead. We have used the van on electric hook-up in winter running an oil-filled radiator and it was toasty.

Still, since I had everything pulled out, I added some some aluminium backed sticky foam over some sound-deadening strips, and added some basic recycled plastic insulation in most of the cavities. I skipped the floor insulation to avoid raising the floor height. Will these sections of insulation make a huge difference? Hard to say yet – more cold-weather testing needed. The sound deadening strips certainly helped make the van less “echoey”.

When refitting the interior, I also extended the headboard while also providing another storage space.

With the double passenger seat rotated and the roof up, the interior is totally transformed.

What’s Next?

The Bluetti power station has been great, but it’s a workaround. I want a permanent, integrated 12V electrical system. Here’s the plan:

  • A LiFePO4 battery under the driver’s seat.
  • A battery-to-battery charger (required for smart alternators, where a voltage-sensing relay would have been fine on.. err… dumb alternators).
  • A solar controller, integrated if possible with the battery to battery charger.
  • A fixed solar panel, though I’m reluctant to drill through the pop-top roof to feed cables. We don’t have a driveway, so a solar trickle charge while the van is parked at the side of the street is ideal for keeping the system topped up and ready to go.
  • Mains Electric hook-up under the bonnet, just feeding a mains plug strip – nearly every power requirement I have is 12 volt or USB-C, no need to run mains wiring around the van.
  • Maybe an inverter, but I would likely use a larger powerbank with built in inverter to drive appliances (e.g. induction hob, air-fryer) and leave the built-in battery to run the basic 12 volt system.
  • More storage – there’s never enough!

That’s the journey so far – from minimal dark and cramped, to comfortable (but still minimal-ish). I’ll post again once the electrics go in.

From Lead Acid to Lithium: 15 Years of Battery Tech on the Road

Fifteen years ago, I sat under an awning at a Devon campsite, juggling cables, adapters, a 20Ah Halfords-branded lead acid power pack, and an ageing MacBook that would wheeze its way through two hours of work – on a good day. Back then, trying to work remotely from a campsite felt more like a mad experiment than a lifestyle. Every percentage of battery charge was a precious resource. Every cloudy day a threat to productivity. Yet, somehow, I made it work.

Fast forward to 2025, and it’s genuinely hard to believe how far portable power tech has come. These days, I’m running a MacBook Air with the M3 chip, which casually sips power through a full day of development, writing, and Zoom calls. The machine itself has a battery life I would have barely dared to dream of in 2010. But what’s really game-changing is how easy it is now to keep everything else powered alongside it.

Power That Keeps Up With the Lifestyle

My current mobile setup includes a Bluetti EB55 power station paired with a 200W AllPowers solar panel. On a sunny day (and even on a not-so-sunny one), this combo allows my wife and I to:

  • Charge two MacBook Airs.
  • Keep two smartphones topped up.
  • Boil water for several cups of coffee throughout the morning using my compact travel kettle.
  • Run a 12 volt compressor fridge (most of the time).

The travel kettle pulls about 650 watts and takes roughly five minutes to boil. While that’s a decent draw, it’s well within the EB55’s capability. And thanks to the solar panel – providing between 0 and 120+ watts depending on cloud cover – I can keep the energy flowing steadily throughout the day.

And all of this, more or less indefinitely. No more rationing screen time or hoarding battery percentages. No more panicked trips to the campsite loo block to find a working plug socket.

That said, I have found the limits of the EB55. When I’m using it to power the campervan fridge alongside everything else, it can get depleted within 24 hours on a cloudy day. I knew that would be the case going in, and in a way it’s helpful – it’s given me a clearer picture of what I’ll need to spec out a more capable, permanent solution for the VW T6 campervan setup.

Why the EB55?

One important advantage of incorporating a portable powerbank like the EB55 into my campervan setup is the flexibility to hunt out a sunny patch away from the van to get the best possible solar input. I do have some long leads which allow me to locate the solar panels away from the van, but using them reduces charging efficiency, so having a portable powerbank that can be easily relocated is a huge plus.

The Bluetti EB55 hit a sweet spot for me, mainly because of its price point. I wanted something portable and capable, but without dropping a grand or more on a bigger system. For the cost, the EB55 packs in an impressive set of features: multiple DC outputs, a 700W inverter (with a 1400W surge), and a compact form factor that fits easily in my van or under a table when I’m set up outside.

It’s also pulled double duty as part of my live music gear, powering both a guitar amp and a bass amp for mobile gigs with my surf-rock band, Los Savages. Not something I had originally planned for, but a very welcome bonus!

That said, if I were building a van power system entirely from scratch and didn’t want to wire in a full DIY lithium setup, one of the larger Bluetti models (like the AC200P or AC180) could easily be the central power hub for a campervan. These units can:

  • Power a 12V fridge.
  • Run interior lighting.
  • Keep a water pump going.
  • Provide USB and 12V outputs for devices.
  • And even power appliances like air fryers, induction hobs, or a hair dryer via the built-in pure sine wave inverter.

For a lot of people, these newer generation power stations are becoming viable alternatives to traditional campervan leisure battery systems, especially when paired with solar or shore power.

USB-C: The Quiet Revolution

One of the most underrated advances in recent years has been the standardisation around USB-C charging. Where I once needed a mishmash of proprietary cables, inefficient DC-DC converters, and power inverters to keep everything topped up, now I can charge almost all my key devices – laptops, phones, small powerbanks, even some bike lights. It’s streamlined my power setup massively and eliminated a lot of energy waste from voltage conversion. This might seem like a small change, but in practice, it’s made remote working and living on the road much more seamless.

Looking Back: A Timeline of My Mobile Power Evolution

Here’s a rough timeline of the gear that’s powered my digital nomad experiments over the years:

  • 2010 – Camping with a 20Ah lead-acid jump starter and a power inverter. Preparation & charging
  • 2010 – One week running on battery and solar power. A week on battery and solar power and Day 2
  • 2010 – Reflections after 6 weeks on the road. Lessons learned
  • 2013 – T25 mobile office experiments. T25 mobile office
  • 2013 – Early solar dreaming with the Solar Gorilla. Solar Gorilla, Nexus 4 and solar daydreams
  • 2018 – Got back into van life with a VW T4 that included a large lead-acid leisure battery, charged via a simple split-charge relay or 100W portable solar panel. We have a van again
  • 2018 – Running a home office using solar power. Part 1
  • 2021-2025 – Bluetti, EcoFlow and Jackery power stations become mainstream in these kind of set-ups.
  • 2025-2026 – Planning and building out a full VW T6 campervan lithium battery and solar setup

What’s Next?

Although I’m a weekend warrior who works mostly from my garden shed, I’m building this system with the future in mind. I want to be ready for longer-term vanlife digital nomad adventures when the opportunity arises.

With the VW T6 campervan conversion underway, I’m pushing into more permanent off-grid territory. Here’s a teaser of what I’m planning:

  • A LiFePO4 battery permanently installed under the driver’s seat – chosen for both size and price-point.
  • A DC-DC charger compatible with the van’s smart alternator, making alternator charging the primary source of power (especially important in UK winters).
  • Wired to drive the lights, fridge, water pump (for the tap, not the one under the bonnet!), and multiple USB-C charging points.

I’m not planning to add a mains inverter to this setup- at least for now. For 240V needs I’ll continue to use the Bluetti (and may upgrade to a larger model to handle higher loads needed for e.g. an air fryer or induction hob).

I may also add a solar charge controller and roof-mounted solar later, but given the limited winter sun in the UK, alternator charging will remain the most viable option for year-round reliability.

I’ll be documenting that process in detail soon, so stay tuned. that process in detail soon, so stay tuned.

Raspberry Pi WIFI bridged access point

I usually rely on a wired ethernet connection in my home office, enabled by a powerline adapter running through the mains wiring to the house, where the other end connects to one of the ethernet sockets on an Airport. Yesterday I took delivery of a shiny new Macbook Pro and was reminded that they now only have Thunderbolt 3 sockets, making my Thunderbolt to ethernet adapter redundant. Thanks a lot Apple, that’s another expensive white adapter to add to my box of random useless adapters, and another one or two to buy (I still need a USB port for a couple of things, and displayport/ HDMI for an external monitor or two).

Luckily I had a spare Raspberry Pi 3 B+ lying around, and after a couple of false starts, I now have a bridged wireless access point in the home office, bridging the wired ethernet connection from the powerline adapter. Bridged works best for me so that I still get an IP address assigned via DHCP from the Airport, in the same IP range – it just keeps things simple. I’ve given the PI access point a unique SSID rather than mirror the one used in the house because sometimes it’s useful to know which one you’re connected to.

Installing and configuring the software

This is the how-to I followed: Setting up a Raspberry Pi as a bridged wireless access point. I’m not going to repeat all the steps here, but for what it’s worth, one of my false starts was the result of this part:-

To use the 5 GHz band, you can change the operations mode from hw_mode=g to hw_mode=a.

Apparently this works for Raspberry Pi Model 3B+ onwards, but it just didn’t work for me – the access point didn’t show up. After changing it back to the default “g” it works fine. The powerline adapters (and the mains wiring they use) already limit the speed of the connection a fair amount, so i’m not too bothered about this.

The other false start was following a completely different how-to, which only resulted in locking myself out of the pi via ssh and creating an access point which didn’t provide internet access!