Rick Hurst Web Developer in Bristol, UK

Menu

Blog

Upgrading to OSX Mavericks

I’m a late adopter, but I finally took the plunge and upgraded to OSX Mavericks tonight.

A few gotchas:-

  • I had to reconfigure Apache for PHP and virtualhost support
  • I had to re-add a symlink for the MySQL installation:-

sudo ln -s /usr/local/mysql-5.6.10-osx10.7-x86_64/ /usr/local/mysql

  • I also had to reconfigure ssl
  • I had to reinstall vagrant (because of lost path)

Cool runnings – France 2014

T25 overheating

There’s a saying that people use after a successful trip in an old vehicle, something like: “I just did a 1000 mile trip and it didn’t miss a beat!”. At the end of July we did about 2000 miles round trip from Bristol down to southwest france and back and Rocky didn’t just miss a beat, but played the wrong song, pushed the drum kit off the stage and started to try to steal the guitars!

Before setting off to France with our new tdi engine conversion we covered 1500 miles in the UK without a hiccup, so I was confident that the engine was going to handle a similar distance on the continent. We decided to take the Plymouth – Roscoff ferry as we planned on travelling down the west side of france over a few days staying at Aires and municipal campsites to reach a family campsite in the Gers region.

On the approach to Plymouth, I noticed that the temperature gauge was a bit higher than usual, but it was a hot day, we were fully loaded and there were some steep hills. After the overnight ferry we headed off south, armed with the All the Aires in France book and a recommendation for a nice municipal site at Chatellerault. Once again, the temp gauge seemed to be a bit higher than usual (on test runs so far it had always sat mostly bang in the middle).

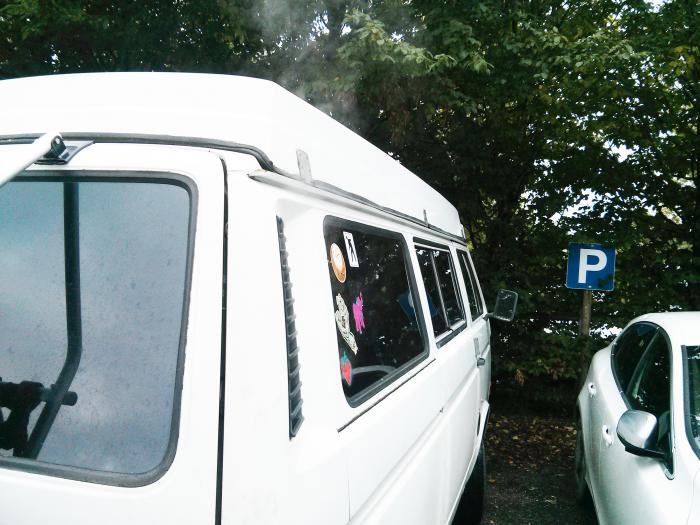
It was only when we came off the motorway and crawled through some roadworks near Cholet that things went seriously wrong. The temp gauge suddenly went to the top, the coolant light started flashing and we dived straight into a garden centre car park, switched off the engine and saw a plume of steam appear in the offside rear air vent.

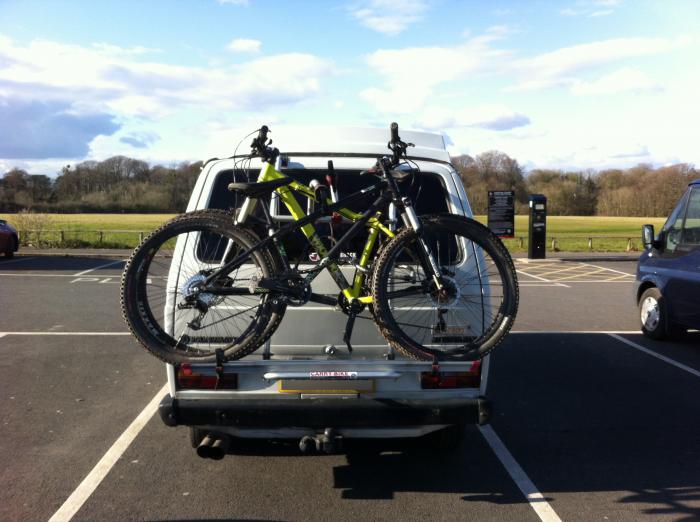
One of the annoying things about a T25 is that to get to the engine when the van is fully loaded you need to remove the bikes from the rear rack, then all the stuff packed in the rear section to get to the engine lid. This was the first of many times I had to do this..

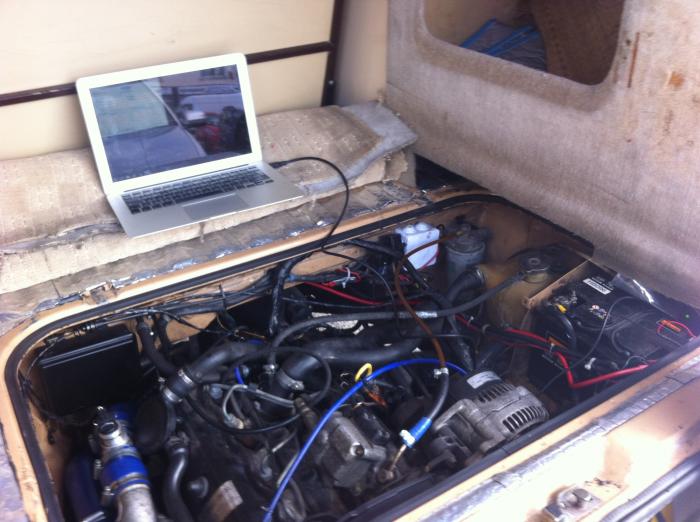
After letting the engine cool down a bit, I started looking for problems – it was clear that the coolant had vented off through the expansion tank pressure cap (the expansion tank is the one inside the engine bay – my tdi conversion doesn’t have the second top up tank behind the number plate). I couldn’t see any other leaks, so topped up the coolant and thought it would be a good idea to bleed the system. To do this you need to start the engine – but the starter motor was dead – nothing at all.

We had European breakdown cover, but I was determined only to use it as a last resort, as I know from experience that the first thing they are likely to do is tow your camper to a garage, where you won’t hear anything for days, leaving you homeless.

So I tried all the usual things – jump start from the leisure battery (ours is suitable for starting engines), running a live feed straight to the trigger wire on the solenoid (as taught to me by an AA man in Norfolk on our first road trip in Rocky). Nothing got any response, and the only thing I didn’t try at that point was the “screwdriver across the starter terminals” technique – I was a bit nervous about doing so, until I had consulted the forums to get a consensus whether that was a good idea.

As the engine was cool now, we managed to bump start Rocky, with my wife at the wheel and myself and our 10-year old kid pushing. I can confirm that a fully loaded T25 is a very heavy bus – if we weren’t on a slight slope I don’t think we would have managed it!

The temperature seemed stable so we decided to make some progress, and started picking out nearby “Aires de camping car” from the book. Just to clarify here – Aires de camping car are entirely different to the motorway aires – they are allocated spaces in towns and cities where motorhomes can overnight for a small charge, and luckily there are thousands of them across France.

We started overheating again on the slower roads, so stopped at a supermarket in Mauléon – parked on a slope, and I bought some more coolant and topped up again. Once again we had to bump start the van, but this time rather than heading straight off, I ran through the bleed procedure in case we had any airlocks in the system.
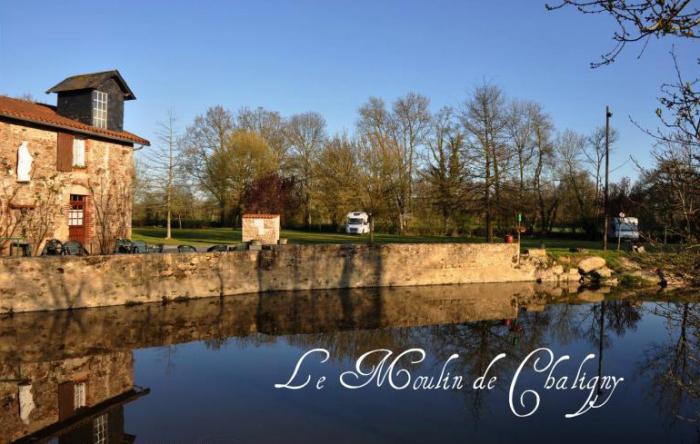
camping a Le Moulin de Chaligny near St. Amand sur Sevre

We headed for an Aire listed in the book, camping a Le Moulin de Chaligny near St. Amand sur Sevre, which turned out to be a really nice private campsite in the grounds of a bar/restaurant. Arriving in a cloud of steam, I picked a spot and parked up before enquiring if there was space, as I knew we weren’t going anywhere for a while! I would highly recommend it if you are passing by.

Luckily, the next morning the van started straight up, and has continued to do so every time since. My best theory is that the battery earth connection was bad and that the liberal soaking the battery and straps got during the first overheating episode was the cause?
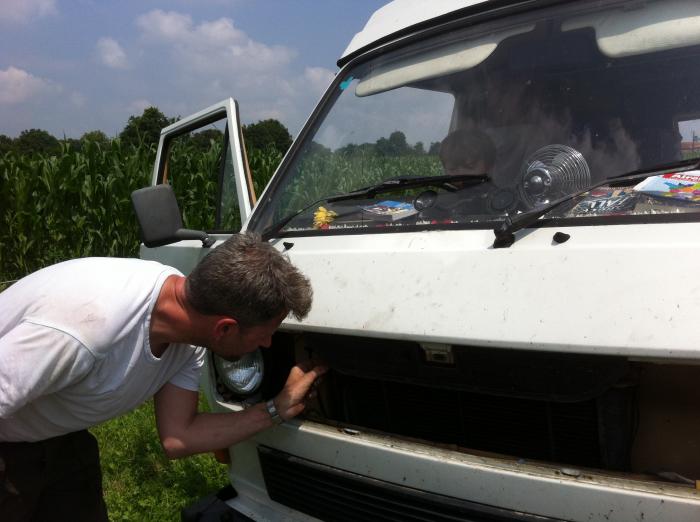
Bleeding a T25 radiator

We spent the next couple of days at that Aire, with me mostly working on the van. – after consulting the forums and using the “phone a friend” option, I removed the thermostat (to allow coolant to always flow to the radiator), and extensively bled the system.
A few test runs showed that although the problem wasn’t fixed, the van behaved OK at higher revs. We filled up the diesel tank (I had a new tank fitted by Jeff’s VW shack before the trip as the old one would leak if you filled it to the top – although he problem was just a breather, the old tank was very corroded so a new tank was fitted). Once on the motorway the temp stayed stable, so we ploughed on down to the campsite we had booked at La Romieu in the Gers region. Once off the motorway the temp started to rise again, so we pulled over and let it cool down, and topped up and re-bled the system – frustratingly only a few miles from our destination.
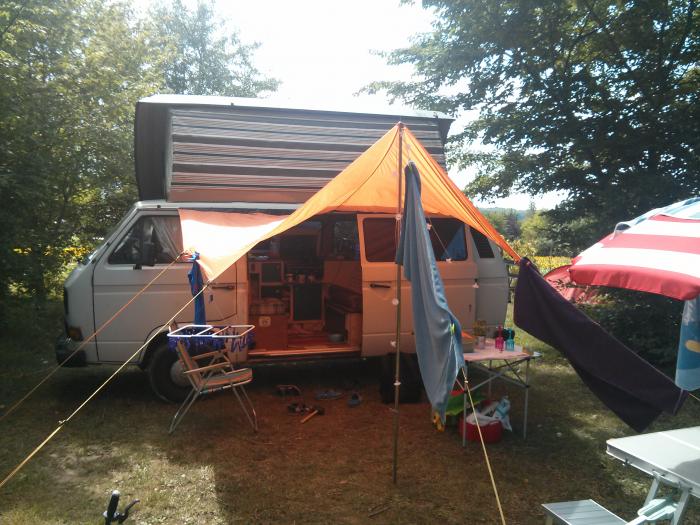
Pitched up at camp de florence

Safely pitched up on the campsite at La Romieu, the holiday continued, but short trips showed that the overheating issue hadn’t gone away. With the help of a French friend we tried to find a garage to take a look at it, but it seemed that every garage in the surrounding area was either closed or understaffed due to August holidays. We set up our tents (we bought enough camping gear with us this year, after our breakdown experience last year) and dropped Rocky off at the only open garage we could find. The next morning they phoned and said they didn’t understand old vw vans and could we please come and take it away (no charge)…

I was fairly sure at this point that the cause of the overheating was a faulty water pump. I’ll save you the suspense, and tell you that it definitely was. I didn’t have the tools with me to change a water pump, and having not changed one before, I was nervous of digging the hole deeper – taking a running but ill-behaving van and changing it to a non-running one with bits of engine missing. In retrospect, at that point I should have gone ahead and ordered one anyway, to be delivered to the campsite. In further retrospect, in preparation for the trip, the water pump should have been inspected and tested (I presumed I had a new one in there at the time of the engine swap, but there you go..).

I also connected a “chicken switch” to the radiator fan, so the fan could be switched on manually – I actually used one of my redundant mystery dashboard switches – on closer inspection I found some old wiring leading from near this switch down to the thermoswitch on the radiator, so i’m fairly sure this was the one-time purpose of the switch anyway!

Sunflower field at camp de florence

I’m missing out the good bits of the holiday here – campsite was great and the area was beautiful, it was very social, hung out with old friends and made some new friends, having a temperamental van that we didn’t want to take far from the campsite forced us to stop rushing around and enjoy the company, pool, ice creams, cheap rose wine, games and conversation (mostly about the van on my part, I have to admit).

Bar camp de florence

So at this point, the dilemma over the engine remained – call in the breakdown cover (i’m fairly sure they would just tow the van to the garage we had already tried) or struggle on. I then contacted the legendary John (aka “Sarran1955” -see his youtube channel here), as I knew he was only a few hours away in the Correze region, and had heard good things about him in the club 80-90 forum. It was arranged that we could visit him (if we could get there), camp on his land and he could help us out with tools and expertise.
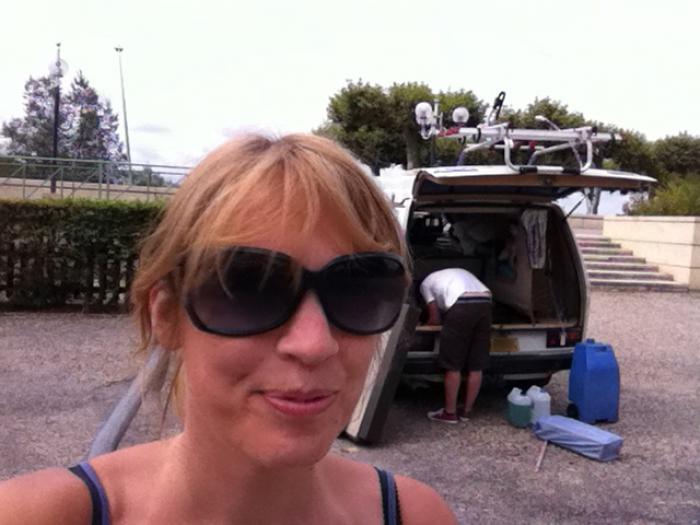
Breakdown in Agen

The trip to Sarran didn’t start well, as we were approaching the town of Agen, the van started to struggle on hills and the turbo whistle had become very loud – we pulled over, offloaded the bikes and unpacked the back for the umpteenth time, to discover one of the silicone hoses for the intercooler had popped off. As the engine was hot and the pipe slippery from oil residue it took a while to reattach. About a mile down the road, as we accelerated onto the motorway, the same thing happened again, luckily as we passed a convenient Aire. Second time around I did a better job of re-attaching it and did a few hard acceleration test runs around the Aire (to the disapproval of several picnicking families).
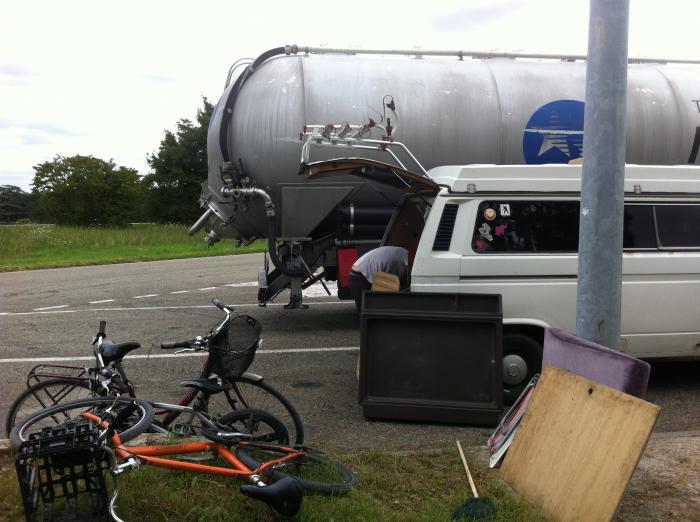
Once on the motorway the intercooler hose stayed on this time and the van stayed at a stable temperature, but would rise quickly once on slower moving roads. We managed to reach the town of Sarran without any further breakdowns and met up with John at the Musée du président Jacques Chirac in Sarran. We were soon pitched up in a spot that will be familiar to several club 80-90 members, overlooking the surrounding landscape.
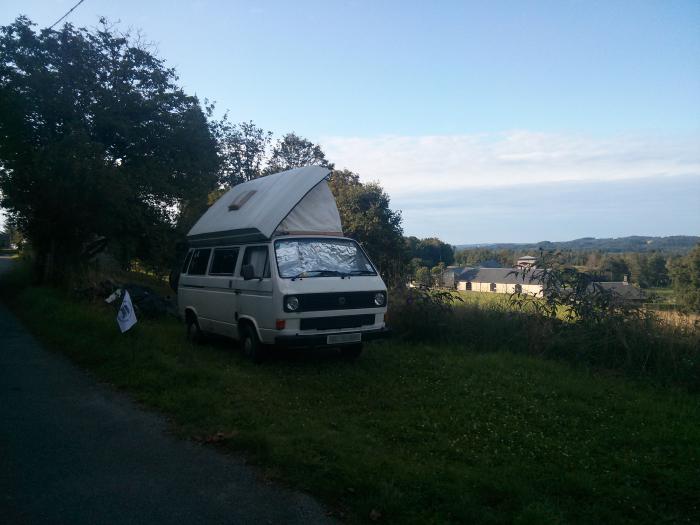
Pitched up in Sarran

I’ve already spoiled the story and told you that the overheating was caused by a failed water pump, but at this point we weren’t sure of this, so spent a few days investigating some other possible causes – we bled and re-bled the system, checked that water was flowing around the system, checked that there weren’t any leaks allowing air to get in. The confusion was caused by the intermittent nature of the water pump failure, so several times we came to the (wrong) conclusion that the water pump must be ok – it turned freely and we could observe water circulating in the expansion tank (most of the time). At one point we though it was solved and even did some fun hill climbs following John in his air-cooled T25 up to Puy de Sarran, the highest point in the area, without overheating, only to overheat on a leisurely drive a few hours later. In the end we decided that the water pump should be replaced anyway, even if just to rule it out as the cause.
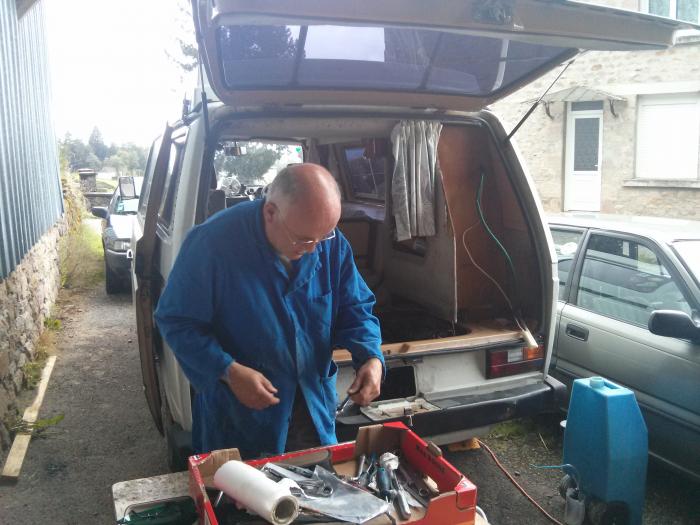
John in Sarran

A nearby VW parts supplier was found, but to be sure we got the correct pump, he suggested we remove the existing water pump and bring it along for comparison. So we set about removing the water pump, but somewhere along the line deviated from the plan. I had read, and been told, that it is possible to remove the water pump on a 1z engine without disturbing the timing belt. It is possible, but you need to remove the whole assembly (including disconnecting the hoses). For the record (it’s easy when you know how!) to remove the water pump on a 1z engine without removing the timing belt:-

  • disconnect the battery (for safety reasons)
  • remove the auxiliary belt (rotate the tensioner arm with a wrench until the belt goes slack)
  • remove the alternator, and the mount/bracket that it is bolted to.
  • disconnect the hoses from the back of the water pump assembly (obviously coolant will go everywhere when you do this, so be prepared!)
  • remove the four bolts/ studs on top of the water pump assembly
  • you can then remove the assembly and detach the water pump and front plate from the housing
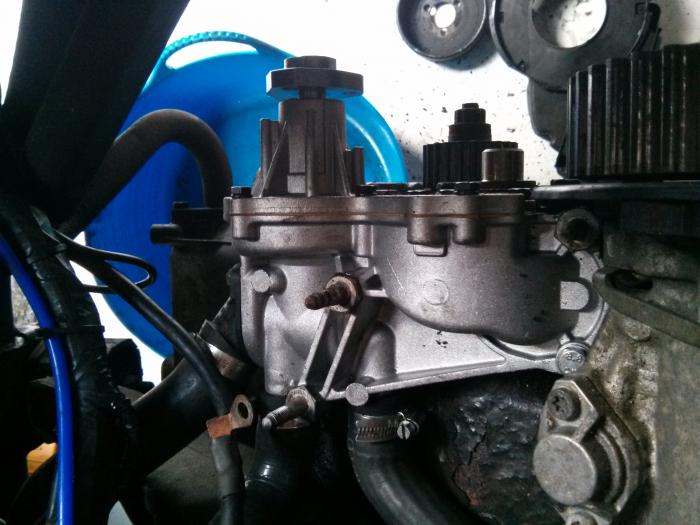
1Z waterpump fitted

However, we missed some key info here and ended up removing the timing belt. If you remove the timing belt, the water pump and the front plate can be separated from the water pump housing without removing the alternator etc. As water pumps are usually replaced at the same time as the timing belt, most people do it that way, but be warned – fitting a timing belt is a tricky job and an engine can be seriously damaged if the timing is out.
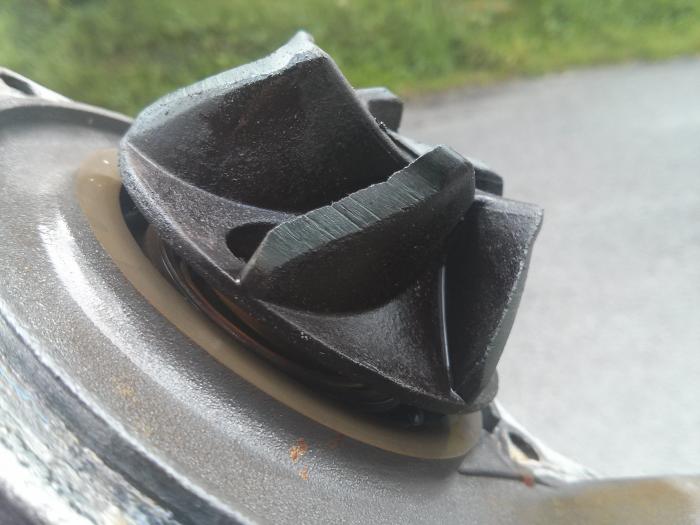
worn waterpump impeller

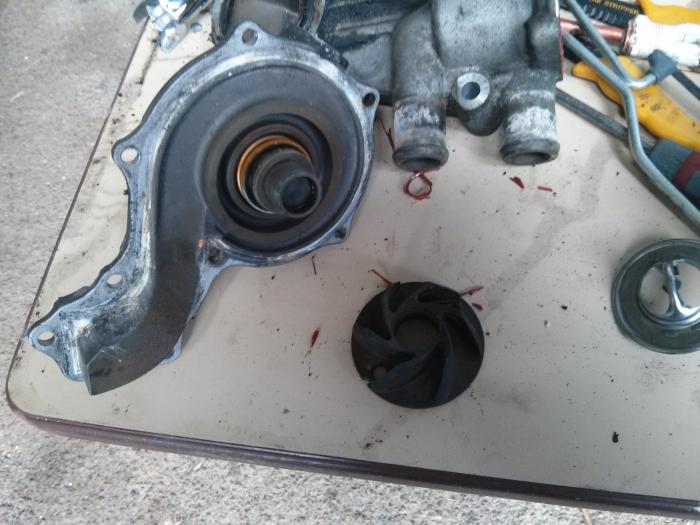
detached impeller

Once removed it was evident that there was a problem with the water pump – the plastic impeller showed signs of wear, so it must have been making contact with something, and we then noticed that the impeller could be rotated on the shaft (and easily removed, once out of the housing). This explained the intermittent nature of the overheating – sometimes the impeller would catch on the shaft and therefore be pumping correctly, other times it was slipping on the shaft and struggling to pump at all.
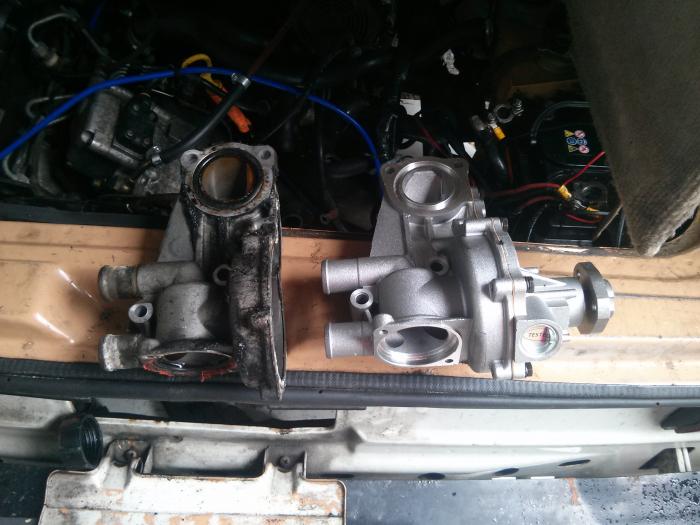
new waterpump ready to be fitted

The water pump was replaced with a new one – the whole assembly, as this is what the supplier in the nearby town had on the shelf, it was a bank holiday in france the next day and we needed to make our way back to the UK sooner or later! I’ve since thought about this, and realised that a potential “get us home” fix if we couldn’t source a pump, could have been to araldite the impeller back onto the shaft.
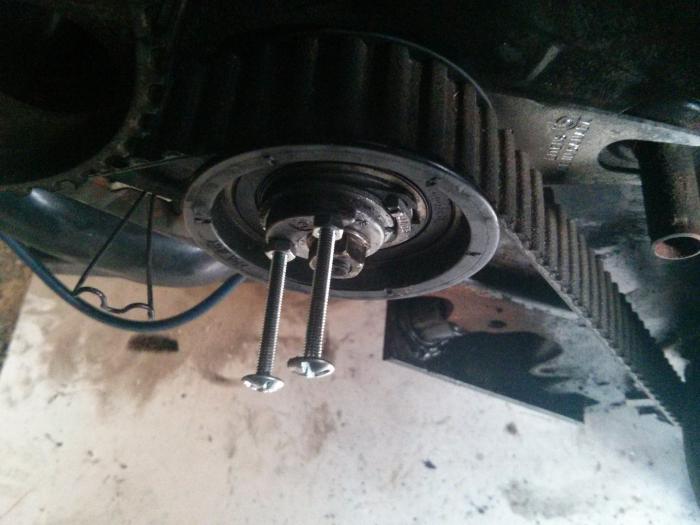
using bolts to help with timing belt tensioner

Next we fitted a new timing belt. We didn’t have the correct tools or time to source them. Notably missing was a timing belt tensioner tool. John came up with the ingenious solution of tapping (creating threads in) the holes in the tensioner so that we could screw in a couple of 4mm bolts. These bolts could be held by a wrench or pliers to rotate the tensioner and tension the belt.

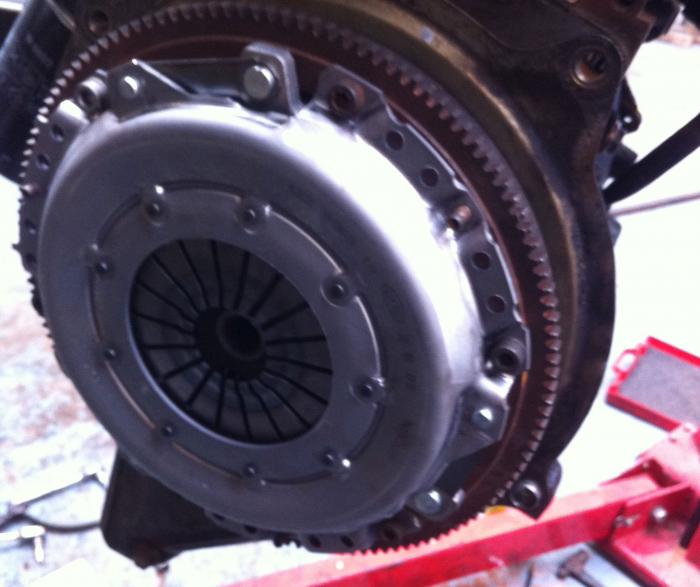
The next challenge was timing – despite our best efforts to mark up the old belt and pulleys with paint marks, the timing was slightly out on first attempt, so that the engine wouldn’t start. We consulted the internet (youtube videos of processes such as these are gold-dust) and then went through the full timing set-up from scratch – we removed the rocker cover and locked the camshaft at Top Dead Centre (TDC), using a steel shim and some feeler gauges. We located TDC on the flywheel – my 1z conversion uses a JX flywheel and the TDC mark is actually on the clutch pressure plate – an arrow that can be found between two lugs. This can be spotted through the inspection hole on the bell housing, and needs to be lined up with a pointer on the housing. This can be locked in place by putting the van in gear.
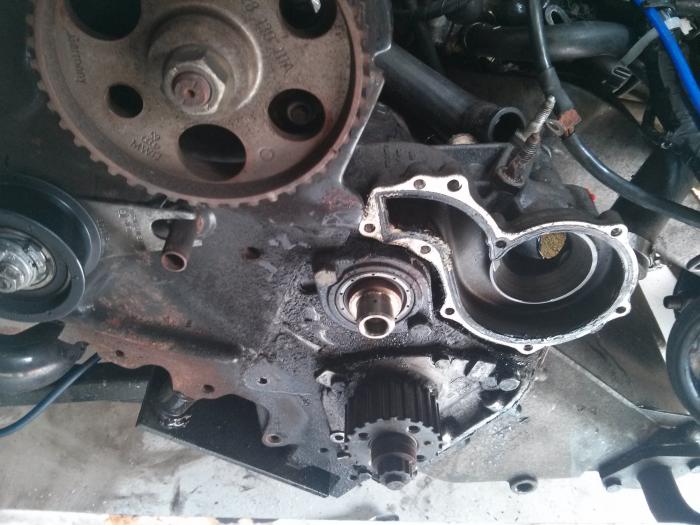
fuel injection pump pulley

The bit that threw us was the fuel injection pump – this can be locked in the correct position using a tool pushed through the smallest hole on the pulley. We used a socket handle with tape to shim the difference in the size of the hole in the pulley and the corresponding hole in the plate behind. There was too much play, so first attempt again, the engine wouldn’t start. I should add here that before trying to start an engine with a new timing belt, always crank the engine over manually (using a socket on the crankshaft cog – take the engine out of gear and turn for two full revolutions), to check for any mechanical resistance – which would indicate something seriously out on the timing, probably leading to a very broken engine if you tried to start it like that.

Anyway, there is probably a whole blog post to be written on this process, and one that should be written by a mechanic rather than me! To cut a long story short, after a couple of false starts (fuel injection pump one tooth out) we succeeded in fitting and tensioning the new belt and the engine starting on the button as it should.

So then onto the test running – I was still running without a thermostat (to be replaced before running in cold UK winter temps), and the temperature now stayed right near the bottom of the gauge however it was driven, so we confidently concluded that the overheating issue was now solved! We could happily have stayed with John for much longer and got to know the area better in a more relaxed way in our now cool-running van, but we had already been there five days at this point and time and money constraints meant that we needed to start heading north.

John suggested a great municipal site at Spay, near Le Mans as a good “halfway point” and phoned ahead for us to check we could get in after hours. That leg of the journey was fantastic, as I started to relax into driving without checking the temp gauge every few seconds. The campsite was great, just as described and we relaxed into our penultimate night in France.

We had booked a very early morning eurotunnel crossing the day after next as it worked out much cheaper than travelling at peak times and at the weekend. On the trip to Calais we had to stop several times when the intercooler hose came off yet again, but the temperature stayed very low. On arriving at Eurotunnel terminal, the machine offered us a midnight crossing at no extra charge, so rather then sleeping in the camper in the carpark as planned, we had only a short wait before boarding the shuttle train.

We then drove back to Bristol through the early hours without incident and parked up at about 4am, and spent our first night in a proper bed in nearly a month!

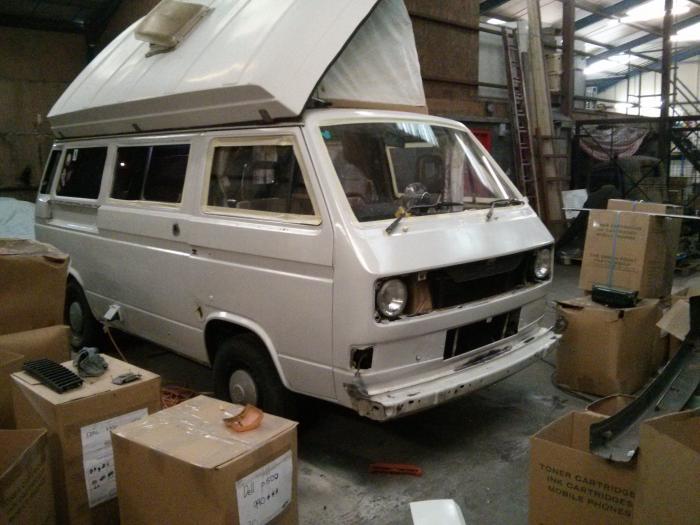
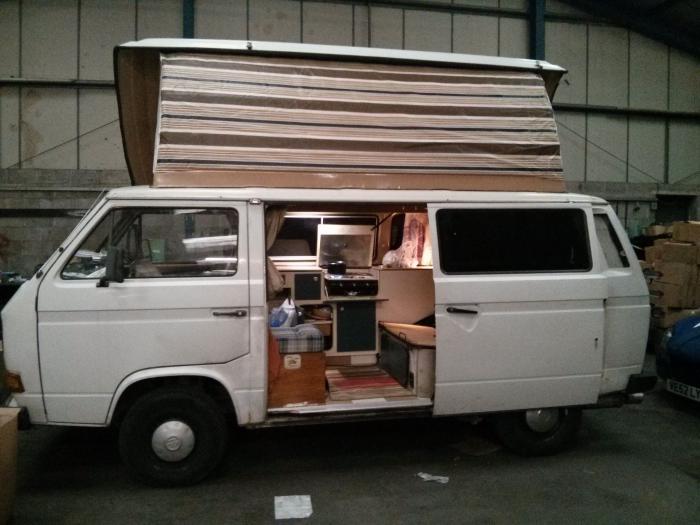
Ironically back in the UK Rocky is now behaving perfectly – I took some time to clean up and properly clamp the intercooler hoses, and tighten the mounting. I decided to take it off the road for a few months to give the body work some TLC and sort out a few other bits and pieces in time for spring. I don’t really want to take it off the road for the whole winter, but time and money constraints mean that I don’t have much choice, so Rocky us now resting up in a friend’s warehouse for the winter.
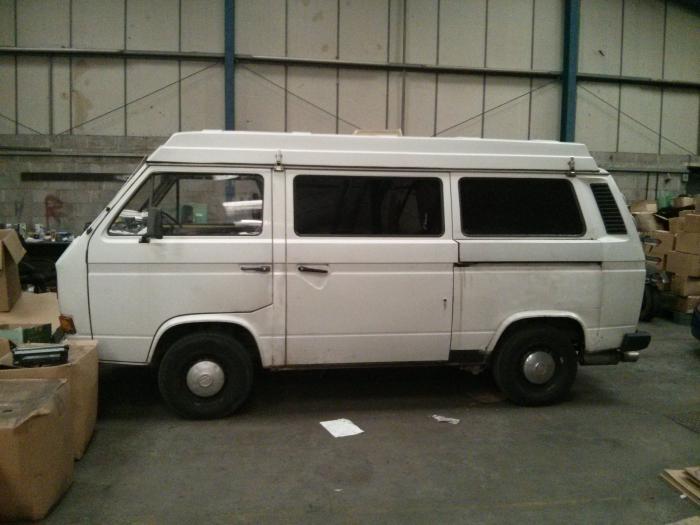
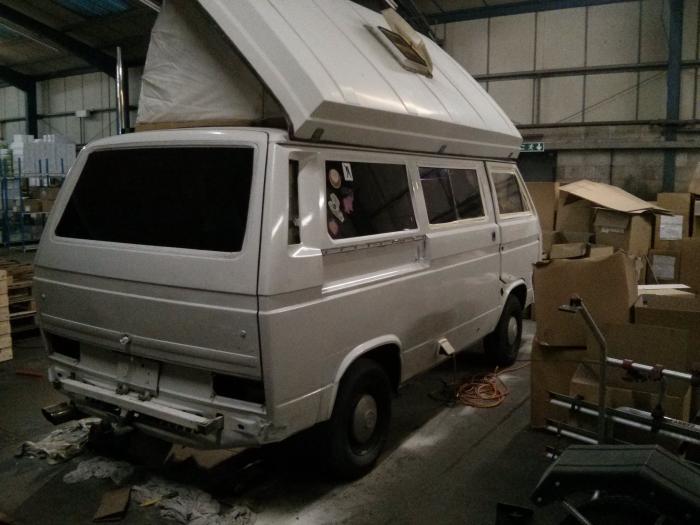
Rocky in the warehouse

New versus vintage Dilemma

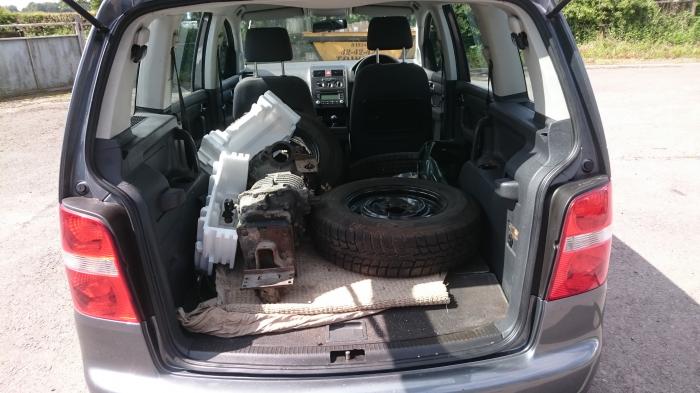
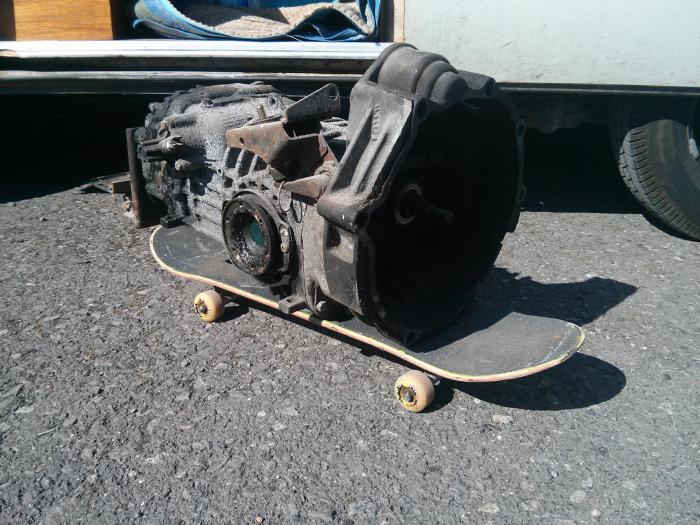
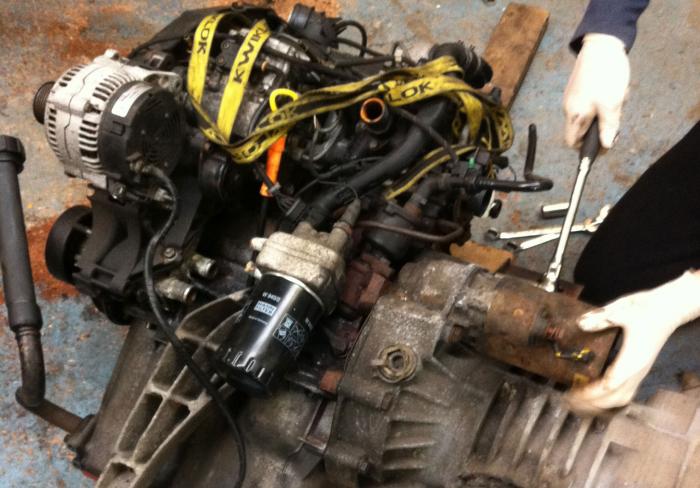
T25 gearbox

I’ve recently started to wonder whether I might be better off aiming to get a more modern van and do a self-build camper conversion. I’ve even joined the Self build Motor Caravanners Club. The dilemma comes from exploring the idea as having a camper van as daily-driver vehicle, and having spent lots of time and money recently keeping a vintage camper on the road.

Pros of a modern vehicle

  • More reliable (at least in theory)
  • More economical (again theory)
  • Easier to insure as a daily driver (though reclassifying a commercial vehicle as a motorcaravan can be tricky)
  • Better for long motorway journeys
  • More safety features (ABS/ Airbags etc.)

Cons

  • more complex technology – more difficult to take on maintenance as an amateur
  • Repairs may be more expensive, as generally new, original parts will be sourced
  • less character – there’s no denying that a T25 puts a grin on my face in a way that the modern vw transporters/mercedes vito/ford transit/vauxhall vivaro etc. don’t. That’s not to say I won’t consider them.
  • higher price – though not always. Well restored vintage VW campers can be extremely expensive

The other thing to consider is that to suit potential budgets, my definition of “modern” includes vehicles that are getting on for a decade and a half old now, with 100 – 150 thousand miles on the clock, so may be prone to exactly the same kind of maintenance issues that an old T25 is prone to – although the older vehicles are more likely to have already had all these items replaced (maybe more than once).

The “repair it, might as well keep it” cycle

This is a cycle that most people with an old campervan probably fall into (I know I do!) – you experience a reliability issue, such as a gearbox problem, and while skinning your knuckles trying to fix it, or while waiting for the recovery service to tow you off the hard shoulder you decide that it’s time to sell it and move onto something more modern. But of course you don’t want to be selling a camper with a mechanical fault, so you go ahead and fix it. Once fixed you decide that you might aswell keep it! And repeat….

Surviving a rainy campervan trip

rainy day in the campervan

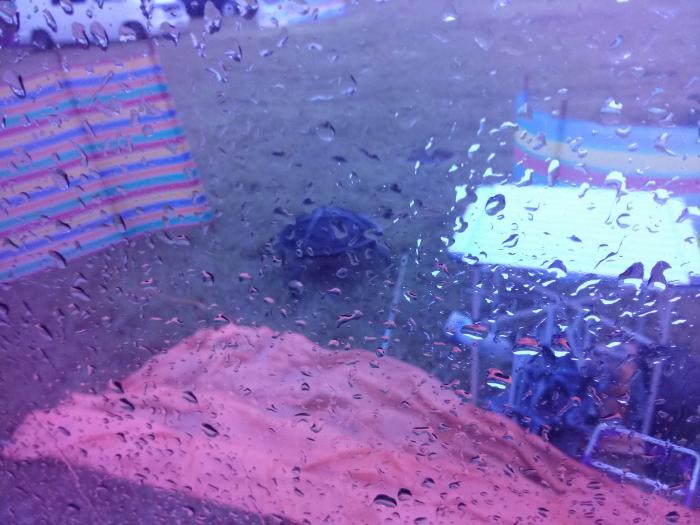
I’m sat writing this in deepest Norfolk, using the passenger swivel seat as my office chair, while on the other side of the curtain (seperating the cab of the van from the back), my wife and kid watch a film on a laptop. Outside it’s persistent drizzle mixed with howling wind. Our bright orange sun canopy lays miserablly on the grass outside the van alongside the wet bag of charcoal and soggy camping chairs. Despite setting it up in “ridge tent” mode to cope with rain, the wind unravelled the granny-knots I used to attach the guy ropes and by morning it was hanging pathetically from the van.

We also made the mistake on this trip of not bringing any kind of tent/ standalone awning, so later on when we go for a drive, we have no choice other than to either take the soggy stuff with us in the van, or leave it on site to get soggier.

We don’t like the idea of a proper driveaway awning hitched right up to the van, we like to be able to sit in the doorway of the van and look out at the view rather than into a tent. We usually bring a Quechua seconds base pop-up shelter, which gets used as a kind of shed, and in this case even a small pop-up tent would be handy, but i’ve heard good things about the Coleman event shelter, and i’m now wondering if this could be the solution for a standalone rainproof canopy. I’ve heard good things about them and they are apparently very sturdy and hopefully won’t collapse in bad weather.

So we haven’t got it right with the canopy/awning/gazebo this time, but the things we have got right:-

  • We have electric hook-up on this site, so the electric fan heater is keeping us toasty. An oil filled radiator would be a less noisy solution. Without the hookup we could fall back on the propex heater. The fan heater can also be used to demist the front window before we go for a drive.
  • We have a full gas bottle, and the kettle is being used to it’s full potential.
  • Loads of films and tv-series on the laptop, there is no wifi and zero mobile reception here, so we couldn’t rely on streaming services or being able to download anything new.
  • As i’m doing a bit of work on this holiday, I made sure I had all I needed on my laptop to do the work without an internet connection – no point relying on cloud-based services. As rainy days are ideal times for fitting in a bit of work, we brought along a second laptop, so that work time for me can also be film-time for my family.
  • Board games! For when the films have run out.

Before we got Rocky, we did a lot of camping in tents, and I have to say after a couple of days of rain like this, we’d probably pack the soggy tents into the car and call it a day, but in a campervan, especially a warm leak-free campervan with a supply of food, tea and entertainment, we can still have an enjoyable trip.

VW T25 1Z Tdi conversion

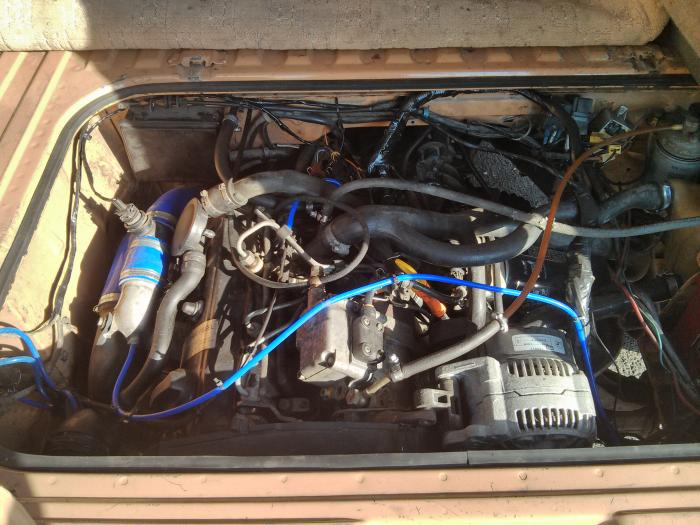
VW 1z tdi engine from a golf mk3 installed in a T25

Those of you who have been following along will know that last year, Rocky’s original 1.6 CS diesel was replaced with a 1.9 1Y engine from a mk3 golf. This was a good upgrade and I would likely have happily plodded around with the 1Y engine for years, had the engine not turned out to be drinking an unsustainable amount of oil.

So while deciding what to do about the situation, I phoned Phil at Millers Motor Services and he very generously offered to trade the engine in against a 90bhp 1.9 1z Tdi engine he had waiting, from a mk3 golf. Millers specialise in engine conversions and have been refining their set-up for the T25 1z Tdi conversion. Whereas the 1Y conversion was almost a straight swap, fitting a Tdi is a more complex install because of the additional wiring and fabrication work. The trade-off is increased complexity versus increased efficiency and performance.

Although the 1Y was an acceptable improvement over the CS, the Tdi is much more of an upgrade and brings the performance of the T25 in line with more modern vans. The VW 1z Tdi is renowned for is reliability, and (if looked after properly) should last for multiple hundreds of thousands of miles. As it has an OBD port for diagnostics, most garages can perform diagnostics on it, and spares should be more readily available than the older vw diesel engines.

After a small amount of deliberation, I decided to go for it, and dropped Rocky down to his unit in Launceston in North Cornwall.

Gearbox and Clutch

jx clutch kit
The clutch was replaced with a new JX clutch kit. The engine mounts to a standard diesel bell-housing and is using my original 1.6 diesel starter motor. So far the starter has had no problem at all with starting the engine, in fact it seems to turn over easier than the CS and 1Y did. It also uses a standard input shaft, but like the 1Y conversion, requires a spigot bearing.

1z engine and t3 gearbox

The gear ratios in my original 4 speed diesel gearbox are too low for a Tdi engine, the revs would be at something like 3,500 rpm at 60mph. The long-term solution will be to have this gearbox rebuilt with bespoke gearing to suit a Tdi, but in the meantime this has been swapped for a gearbox from a petrol T25, which has slightly higher gearing. This is enough to allow comfortable crusing at 60 – 65mph, but the revs are very high above this speed. Although the “new” gearbox (unsure of the code – it’s not visible) is technically a 5-speed, the extra gear is actually an extra-low crawler gear rather than a cruising gear – this is the case for all T25 5-speed boxes, so there is nothing to be gained from swapping from a T25 4-speed gearbox to a 5-speed unless you want to tow heavy trailers up steep hills.

The alternative gearbox solution would be to use a “flipped” gearbox from a different front-wheel drive vehicle such as a passat. This would require the engine to be mounted in a different position and more custom fabrication work (and hence higher installation cost).

Engine Mount

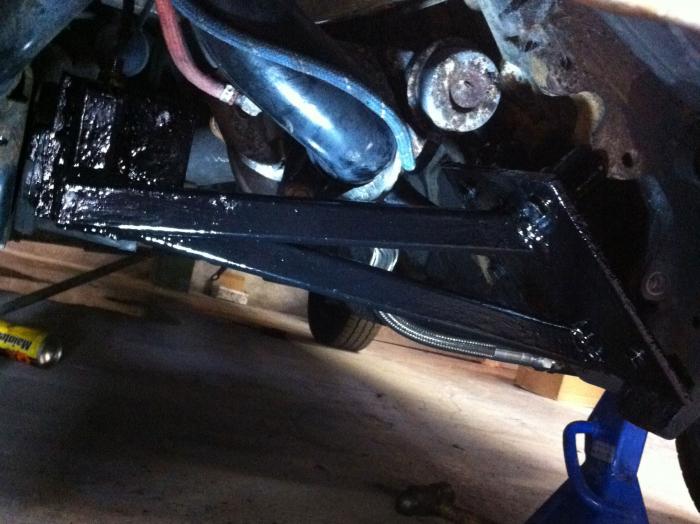
custom nearside engine mount for 1z in a t25
The 1z is installed at an angle, like the original diesel engines in a T25, but the nearside engine mount is not a straight swap, so a custom mount was fabricated fo the job.

Air filter

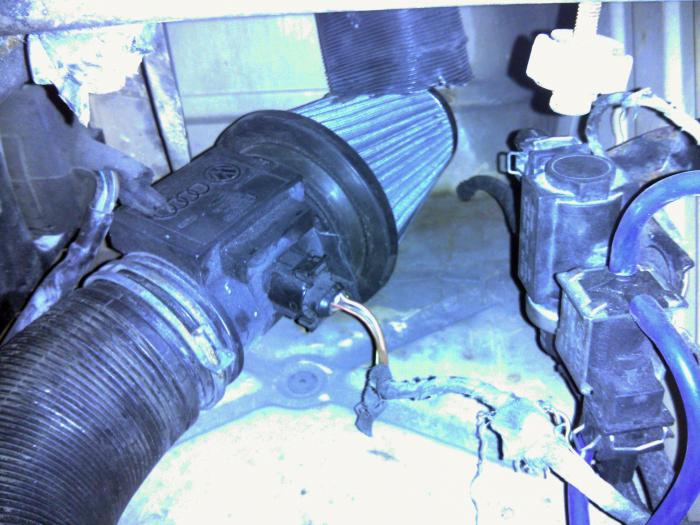
cone air filter behind light cluster
The air box was removed and a cone filter was installed behind the rear light cluster, directly below a duct leading up to the nearside air vent.

ECU and wiring loom

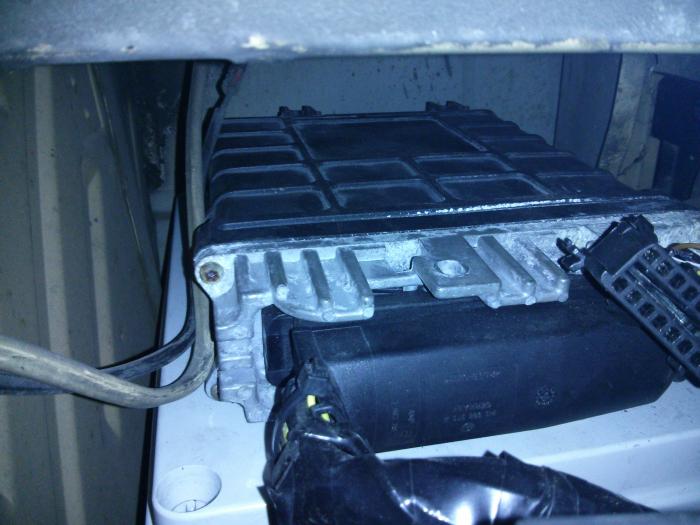
ECU and OBD socket behind battery
The ECU is installed behind the battery, providing easy access to the OBD port. This is an early ECU, and does not have an integrated immobiliser, which makes the wiring installation simpler.
Fly by wire throttle

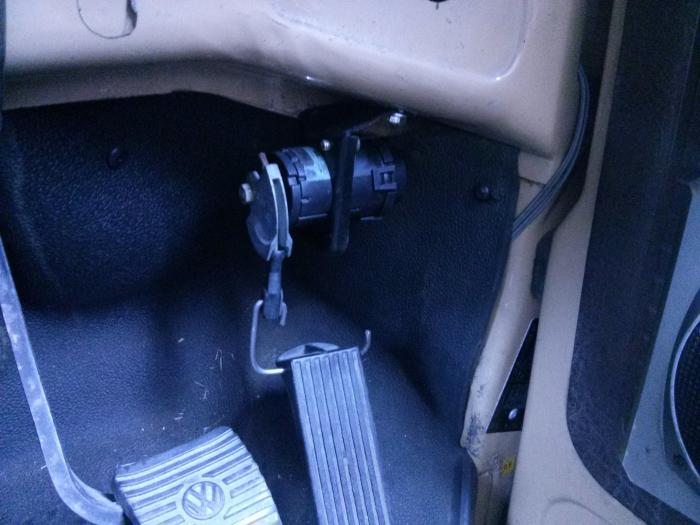
fly-by-wire throttle potentiometer mounted in footwell
The 1z is a “fly-by-wire” engine, so the throttle potentiometer was installed in the footwell. The alternative is to install it in the engine bay and use the existing cable to operate it, but this method means a much lighter throttle pedal. The downside is that it took a bit of getting used to at first while wearing big boots!

Oil return

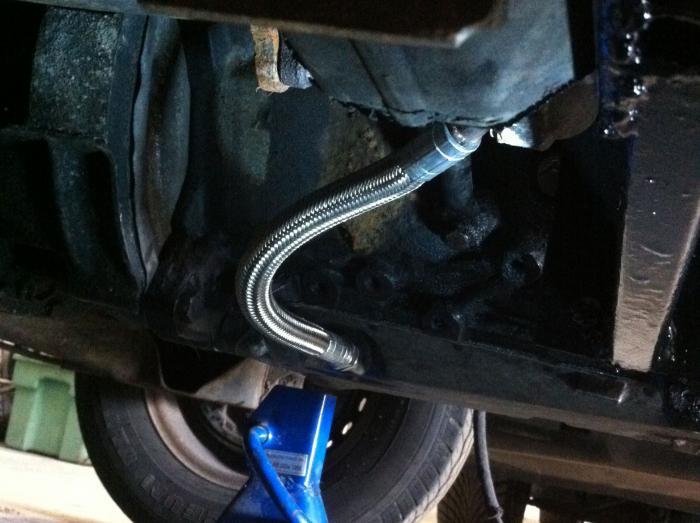
fabricated oil return line form 1z turbo to jx sump
The turbo oil return line was fabricated to feed in to a JX sump. It would also have been possible to use the original CS sump with an adapter kit.

Intercooler

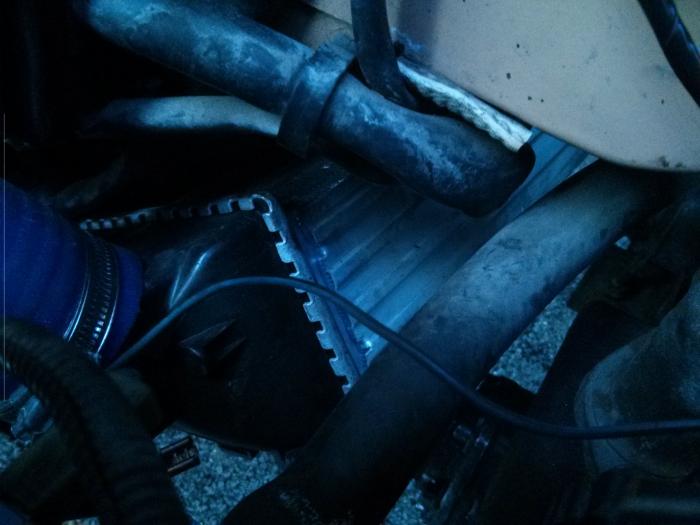
intercooler mounted beside transmission
The intercooler is from a Citroen Xsara Picasso, and is mounted alongside the transmission, angled to receive sufficient airflow.

Rev Counter

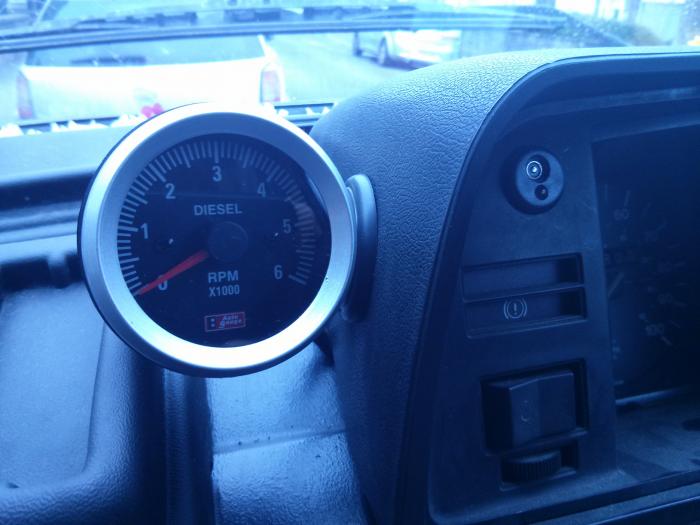
aftermarket rev counter on dash
As my original diesel instrument cluster doesn’t have a rev counter, I asked Phil to install this after-market tacho on the dash. This is driven by a feed from the ECU.

Dipstick

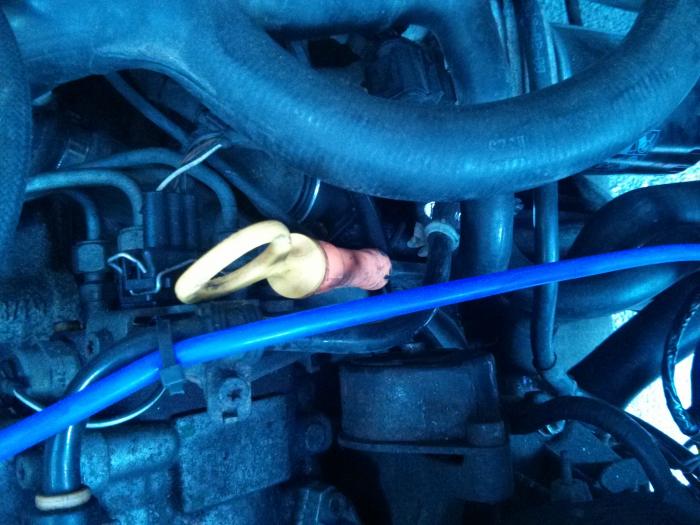
modified dipstick
Having always had trouble with the curved dipstick set-up on my previous engine (accessed in the standard T25 way via the number plate flap), after a bit of research, I decided that I wanted a straight dipstick. I ordered a specifically modified dipstick for a T25 1z conversion mounted at 50 degrees from Greaseworks in the states. I have to admit I ended up paying way over the odds for this after paying for express shipping and import tax, but it does the trick. I’ve retained a T25 oil filler for now, but may blank this off and install an angled filler cap on the rocker cover, as i’ll have to open the engine bay to check the oil level anyway.

Exhaust


It would have been possible to use my original exhaust with a bit of fabrication work to adapt it, but it wasn’t in brilliant shape and Phil had a custom exhaust available from a previous 1z conversion, so this was fitted.

So how does it go?

So far, which at time of writing is about four hours of driving, split between hilly Devon and Cornwall A-Roads and crusing back to Bristol on the M5, it has performed brilliantly. The difference in torque is massive, especially on hills. It feels safer to drive because it’s easier to get up to speed pulling on to roundabouts and out of junctions. On the motorway it is quieter, and happily zips up to the legal speed limit to overtake lorries in the slow lane, but with this gearbox it is definitely happiest cruisng at 60 – 65mph. It is safe to say that I am a very happy customer, and looking forward to seeing how this engine performs long-term.

If you are interested in knowing more about getting a Tdi engine installed in your VW T25 by a specialist, speak to Phil and Kev at Millers Motor Services on 01566 248554 millersmotorservices@gmail.com.

The Camputer Part 3 – API hacking

In part 2 I got RasbBMC installed, and worked out how to get vnc server running. The next goal was to get to know how the music player works, how to create playlists and most importantly hack around with the API so that I can work out how to control it from a python script.

raspbmc displaying on small lcd monitor

My original intention was to run the pi entirely headless, but then I remembered I had already bought a small LCD monitor for a reversing camera, that I never got round to fitting. Hooked up to a 12 volt power supply and to the PI using the RCA socket, I now have a tiny monitor, which is handy for keeping an eye on what is going on with the player.
Most of the text is illegible at that size/ resolution, so I upped all the font sizes for the default skin:-


cd .xbmc-current/xbmc-bin/share/xbmc/addons/skin.confluence/720p
sudo nano Font.xml


Now all the line-spacing is wrong, so is more legible in some places, but less so in others. I don’t want to get side-tracked right now into learning how to skin XBMC. Maybe at a later date, it might be a nice project to create (or find) something specifically for very small screens.
IInitially I couldn’t hear any Audio, so I had to change the audio settings in XBMC to use analog audio out rather than HDMI.

I spent ages reading up on the api, the documentation is pretty confusing and lacking in examples, but eventually I found some simple examples on a forum showing how to interact with the JSON-RPC API.

I was expecting to find some examples of using the python API “directly”, but couldn’t really find anything (or at least anything complete enough to understand real-world use). I eventually found this python xbmc json client.

With that library downloaded to the pi, I was able to speak to xbmc from the python prompt:-


>>> from xbmcjson import XBMC
>>> xbmc = XBMC("http://localhost:8080/jsonrpc")
>>> print xbmc.JSONRPC.Ping()
{u'jsonrpc': u'2.0', u'id': 0, u'result': u'pong'}


To open a saved playlist:-


xbmc.Player.Open([{'file':'/home/pi/.xbmc/userdata/playlists/music/test.m3u'}])


I was then able to play/pause XBMC and move to the next track from the python prompt with:-


xbmc.Player.PlayPause([0])
xbmc.Player.GoTo([0,'next'])


Before I worked out how to open a saved playlist via the API, I noticed that the above play/pause command doesn’t work if the player hasn’t been opened yet i.e. when the Pi has been rebooted. I found a way of opening a playlist and pausing at XBMC startup, by creating a file called autoexec.py in /home/pi/.xbmc/userdata with the following in it:-


import xbmc
xbmc.executebuiltin("PlayMedia(/home/pi/.xbmc/userdata/playlists/music/all.m3u)")
xbmc.executebuiltin( "XBMC.Action(Pause)" )


This is run by XBMC at startup, and doing so ensures that the player has a playlist loaded and ready to play at startup. Currently not sure where this script imports xbmc from or how I could have this available to my own application scripts and managed by XBMC, but there must be a way. Either way I seem to be able to do most of what I need with the JSON-RPC API currently, with the exception of shuffle. The following command toggles shuffle on and off:-


xbmc.Player.SetShuffle({"playerid":0, "shuffle":"toggle"})


The JSON response sais “OK”, but annoyingly it has no effect on the XBMC player. When operating XBMC manually you can open a saved playlist, and at any point click the shuffle button, to toggle shuffle on and off, and the next track will either be in order, or “random” from a shuffled list. I was hoping that this toggle on the API would have the same effect, but apparently not. I think I may have to consult the XBMC forum, once i’ve put togther a precise list of commands that i’ve tried, and checked exactly which version of XBMC and API I am using (you know how forums can be if you go asking questions without providing enough background info!).

If it turns out that this is a bug and there is no solution for shuffling the current playlist with the API, I can envisage a workaround involving dynamically creating a shuffled version of each of the saved playlists. As I intend to create some kind of playlist management app for this (outside of XBMC), it would be a simple step on from that.

So, besides working out a solution for shuffle, the next step is to connect the Piface digital I/O expansion board, and work out how to trigger API stuff in response to button presses.

The Camputer Part 2 – raspBMC installation

(See Part 1 for details on what the project is about and the kit bought for it so far).

I decided to go with RaspBMC as the operating system, on the basis that I wanted something Raspian/debian based, and this distro is exactly that, but with the benefit of being preconfigured as an XBMC media player.

I ordered a 16gb SD card (I intend to keep my media on an external USB drive) and used the instructions to create a bootable raspBMC installation, using my macbook air, which has an SD card slot.


Then I put the SD card in the Raspberry Pi board that I got from UK Farnell, hooked up to a keyboard, mouse, ethernet cable (connected to our home router), power supply, audio cable to my hifi amp and our TV via HDMI cable.

The bootable SD then takes you through the rest of the installation – it took about 25 minutes.


The Pi then booted into XBMC, which i’ve never actually seen before, and it looks great. I enabled AirPlay in the settings and found that I could stream audio and (non-apple DRMed) movies from itunes and from my wife’s iPhone. I’ll probably set one up specifically as a home media system in the future, and probably others just for audio streaming to amps/speakers around the house.

I then went of at a tangent, trying and failing to get a vnc server installed and working, so that I can control it from another device, as it will likely be run headless in the camper van. After a bit of digging though, I realised it already has a VNC server installed which can be enabled in the system settings – the raspBMC settings rather than XBMC settings. You can also start it from the command line with:-


service vnc start


I couldn’t get it to connect using OSX screen sharing, so I installed Real VNC viewer. It seems very sluggish, but works.


So the next stage is to hook it up to a USB drive with some music on it, create some playlists and investigate how I can interact with the player programatically via the API.

Follow-up posts:

Part 3: The Camputer Part 3 – API hacking

Raspberry Pi project – the Camputer (Part 1)

raspberry Pi kit for my camper van in-vehicle computer

I’m building an in-vehicle computer for my camper van. I wasn’t sure whether to blog about this here or on my Camper van blog, but as the project will initially be about software, i’ll start here, then move over to the campervan blog when I get to the point of installing it.

Why does a campervan need an on-board computer?

Well obviously it doesn’t need a computer, but here are a few things i’d like to do with it:-

Media system

I don’t have many CD’s these days, so I currently use my phone or an ipod to provide music to the stereo system, but it is a bit of a faff, fiddling around with cables and chargers and stuff. I’m also pretty disorganised with my music collection and have several small collections spread out over different iTunes libraries etc. It’s also a pain (not to mention dangerous) to operate a touchscreen while driving. The main requirements for my ideal music system therefore are:-

  1. All my music in one library
  2. Physical buttons to play/stop and skip tracks (a bit like an iPod shuffle)

I have in mind a set of switches and buttons on the dash that I can operate by feel. Aswell as the basic functions listed above, there might be toggle switches for different playlists or genres.

The media system could have a small monitor or LCD display, but should be able to be operated using only the buttons. Other operations (such as creating playlists etc.) I would envisage a web interface, VNC or maybe plugging in a monitor and keyboard.

I haven’t decided what media player software i’ll use, but hopefully there is something with a decent api that I can hook my custom controls to.

I’m thinking mainly music, but with a ceiling mounted pull-down monitor it could also drive a (motor)home cinema system in the future,

Engine diagnostics

I have a bluetooth OBII adapter that I use with the Torque Android app. From a quick google around, people are using them with a Pi, so i’d like to set up some logging.

Security/ Tracking

It would be great to have the Pi send location updates to my server, to tie in with my travel blogging. It could also potentially be useful if the vehicle gets stolen, or I lose it in an unfamiliar town!

Remote switching of the heater

My camper has an on-board propex-heater, so the Pi could potentially be used as a thermostat or to switch the heater on from a web/ phone app.

Kit

So far I have:-

So the first phase will be to decide on an OS and media player and work out how to control it using physical switches – watch this space!

Follow-up posts:

Part 2: RaspBMC installation

Part 3: The Camputer Part 3 – API hacking

Search and replace on a large file on OSX using Sed

My code editor of choice, Sublime text 2, crashes when you try to do a search and replace on a large file. This makes it difficult to do a search and replace on a large sql file, as I sometimes need to do when moving a wordpress site from one domain to another

The command-line tool sed can be used instead like this:-

sed -i '.backup' 's/olddomain/newdomain/g' wordpress-backup.sql

This makes a backup of the original file, then updates the original

Overland dreaming

Travel books in kindle store

As you may have guessed from the lack of recent updates, we haven’t been able to use Rocky much over the winter, and he is currently off the road having another engine transplant and a few other jobs sorted (hopefully) in time for spring adventures. Therefore I have been travelling vicariously through reading about other peoples’ adventures. I’ve always been a fan of real paper books, but for reasons of availability and immediate need for reading material, I downloaded the kindle app to my nexus 4 phone and read a few eBooks. It was actually fine reading this way, surprisingly, and was handy as I virtually always have my phone with me, and it gave me something to read other than facebook or twitter.

The first one I downloaded was Not in that car, by Roy Locock, the story of his unlikely round the world trip in a 32-year-old MG midget. A very entertaining read and proof that with determination, you can get any unsuitable overland vehicle round the world, even with only a few inches of road clearance.

Not in that car - MG midget arriving in cape town

On the same theme (and bought to my attention by the “you might also like..” feature in the kindle store), I then read Survival of the quickest by Ben Coombs, about his 13,500 trip from England to Cape Town in a Porsche 944. Apart from the numerous mechanical issues dealt with along the way, I was also impressed to see the Porsche fitted with a roof tent!

roof tent on a porsche 944

The last kindle purchase was The Long and Whining Road by Simon Courtie, an entertaining account of a family travelling round the world in their VW T25, busking beatles songs as they went.

Penny the vw t25 in monument valley

Finally, I ordered a real paper book Drive Nacho Drive, the book about another round the world trip in a T25. I’ve blogged about Brad, Sheena and Nacho before – their blog is great, and some of the content is repeated in the book, but it is extremely well written and worth a read even if you already read the blog.

drive nacho drive book

Last but not least, I have been following the adventures of the campervan culture team, travelling through Spain and around Morocco, and am looking forward to the rest of the videos.